When the first cooler days arrive, crochet projects naturally start to feel a little cozier. Rich rust-colored yarn, soft textures, warm neutrals, and handmade decorations all fit easily into autumn—and few projects say fall as clearly as a crochet pumpkin.
This beginner-friendly ribbed pumpkin begins with something wonderfully simple: a flat crochet rectangle.
There is no magic ring to master, no complicated amigurumi shaping, and no need to count dozens of rounds. You crochet back and forth in rows, create raised ribs by working through the back loop only, sew the short edges together, gather both openings, add stuffing, and finish the top with a small crocheted stem.
The result is a soft, reusable pumpkin that can sit on a mantel, shelf, dining table, desk, tiered tray, or Thanksgiving centerpiece.
For a broad keyword such as fall crochet patterns, this project offers a particularly practical place to start because the construction is approachable while still teaching several valuable skills: foundation chains, half double crochet, back-loop-only ribbing, straight edges, seaming, gathering, stuffing, shaping, and final assembly.
The general Craft Yarn Council skill-level framework places projects built from basic stitches and simple stitch patterns or shaping toward the Basic-to-Easy range. This original tutorial uses that type of straightforward construction.
What You’ll Learn
By completing this fall crochet pumpkin, you will practice:
- Making a relaxed foundation chain.
- Working half double crochet.
- Identifying the front and back loops of a stitch.
- Crocheting in the back loop only.
- Maintaining a consistent stitch count.
- Keeping rectangle edges straight.
- Creating ribbed crochet texture.
- Measuring crochet fabric.
- Sewing an invisible or low-profile seam.
- Gathering an open crochet edge.
- Stuffing evenly.
- Shaping a soft sculpture.
- Making a simple crochet stem.
- Weaving in yarn tails securely.
Materials You’ll Need
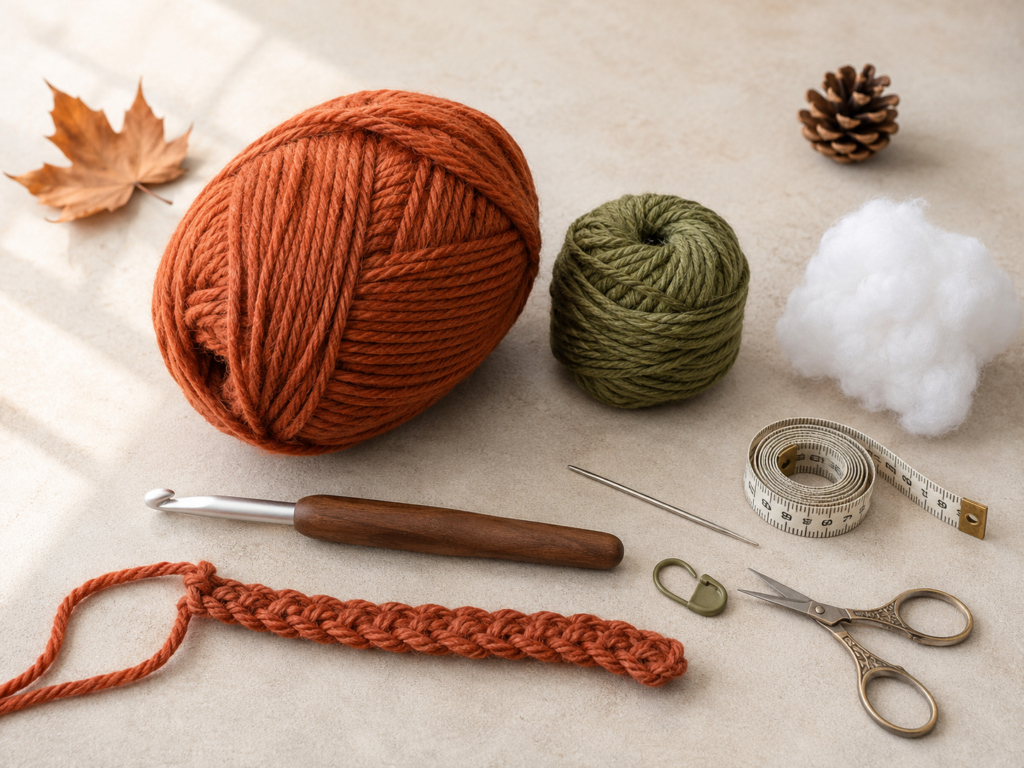
For one medium pumpkin approximately 9 inches / 23 cm wide and 6 inches / 15 cm high, gather:
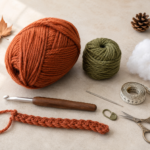
- Approximately 140–180 yards / 128–165 meters of bulky-weight yarn in burnt terracotta.
- Approximately 15–20 yards / 14–18 meters of bulky or medium-weight olive-green yarn for the stem.
- 6 mm / J-10 crochet hook.
- Polyester fiberfill.
- Blunt tapestry needle.
- Scissors.
- Flexible measuring tape.
- Optional locking stitch markers.
- Optional rustproof pins for shaping.
- Optional additional yarn for sculpting deeper pumpkin sections.
The Craft Yarn Council categorizes bulky yarn as weight 5 and lists typical crochet-hook guidance separately from exact individual pattern requirements. Yarn category alone does not guarantee interchangeability, so the appearance of your particular yarn and fabric should guide substitutions.
Finished Size
The original pumpkin described in this tutorial is designed to finish at approximately:
Width: 9 inches / 23 cm
Height without stem: 6 inches / 15 cm
Stem height: Approximately 2.5 inches / 6 cm
Your actual pumpkin may be slightly larger or smaller depending on:
- Yarn thickness.
- Hook size.
- Individual tension.
- Rectangle dimensions.
- Quantity of stuffing.
- How tightly the top and bottom are cinched.
For seasonal décor, exact gauge is less important than achieving a dense, reasonably firm fabric that contains the stuffing securely.
Crochet Abbreviations Used
This tutorial uses standard U.S. crochet terminology:
- ch = chain
- sc = single crochet
- hdc = half double crochet
- sl st = slip stitch
- st/sts = stitch/stitches
- rep = repeat
- BLO = back loop only
- RS = right side
- WS = wrong side
These abbreviations align with the Craft Yarn Council’s standardized crochet abbreviation system.
U.S./U.K. terminology note
This article uses U.S. terms. A U.S. half double crochet is called a half treble crochet in standard U.K. terminology, so confirm which terminology a tutorial uses before starting.
Before You Start
Gauge and tension
Exact gauge is not critical for a stuffed decorative pumpkin, but your stitches should be firm enough that large gaps do not expose the white fiberfill.
The goal is not to crochet painfully tightly. Instead, aim for controlled, consistent tension.
Your rectangle should:
- Bend easily.
- Stretch slightly across the rows.
- Keep its shape when laid flat.
- Have visible raised ribs.
- Hide most of the stuffing once assembled.
If the fabric is very loose, try a hook 0.5 mm smaller.
If the crochet feels stiff and difficult to work, try loosening your grip before changing hook size.
How to count stitches
This original pattern maintains 19 hdc stitches in every row.
At the end of each row:
- Flatten the work.
- Identify the first real stitch.
- Count every V-shaped stitch across.
- Do not count the turning chain as a stitch.
Beginners often accidentally skip the final stitch because it sits close to the turning chain. Check the edge carefully before turning.
How to keep the edges straight
Use one stitch marker in the first and last stitch of the row during your first several rows.
Consistently working:
- One stitch into the first stitch.
- One stitch into every middle stitch.
- One stitch into the final stitch.
will prevent accidental narrowing.
How to avoid curling
A little curling is normal in a ribbed rectangle.
Severe curling usually comes from:
- A foundation chain that is too tight.
- Much tighter turning chains than body stitches.
- Uneven tension.
- Missing stitches.
The finished fabric will naturally relax during assembly and stuffing, so a slight curve is not a problem.
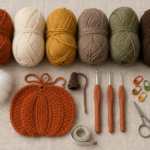
How to choose fall colors
Traditional autumn palettes are not limited to bright orange.
Try:
- Burnt terracotta + olive.
- Rust + cream.
- Mustard + forest green.
- Oatmeal + dark brown.
- Burgundy + camel.
- Dusty sage + walnut.
- Deep pumpkin orange + moss.
A collection of three pumpkins often looks especially cohesive when the colors differ but the yarn texture remains consistent.
Step-by-Step Crochet Tutorial
Step 1: Make the Foundation Chain
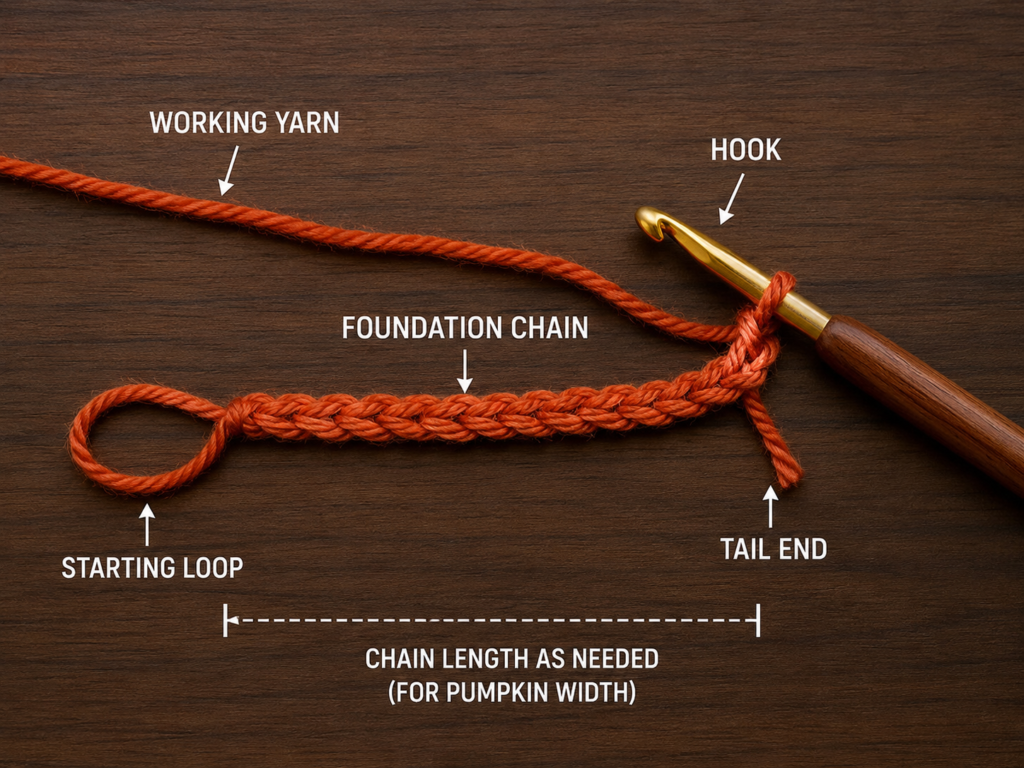
With burnt-terracotta bulky yarn and your 6 mm hook:
Ch 21.
Do not pull the chains tightly.
Hold the chain horizontally and check that every V-shaped stitch is visible.
The foundation chain determines the approximate height of the pumpkin body, while the number of completed rows determines its circumference.
Beginner tip:
After chaining five stitches, slide them farther down the hook shaft. This helps prevent the foundation chain from becoming progressively tighter.
Common mistake to avoid:
Counting the active loop on your hook as a chain.
The loop currently on the hook does not count as one of your 21 chains.
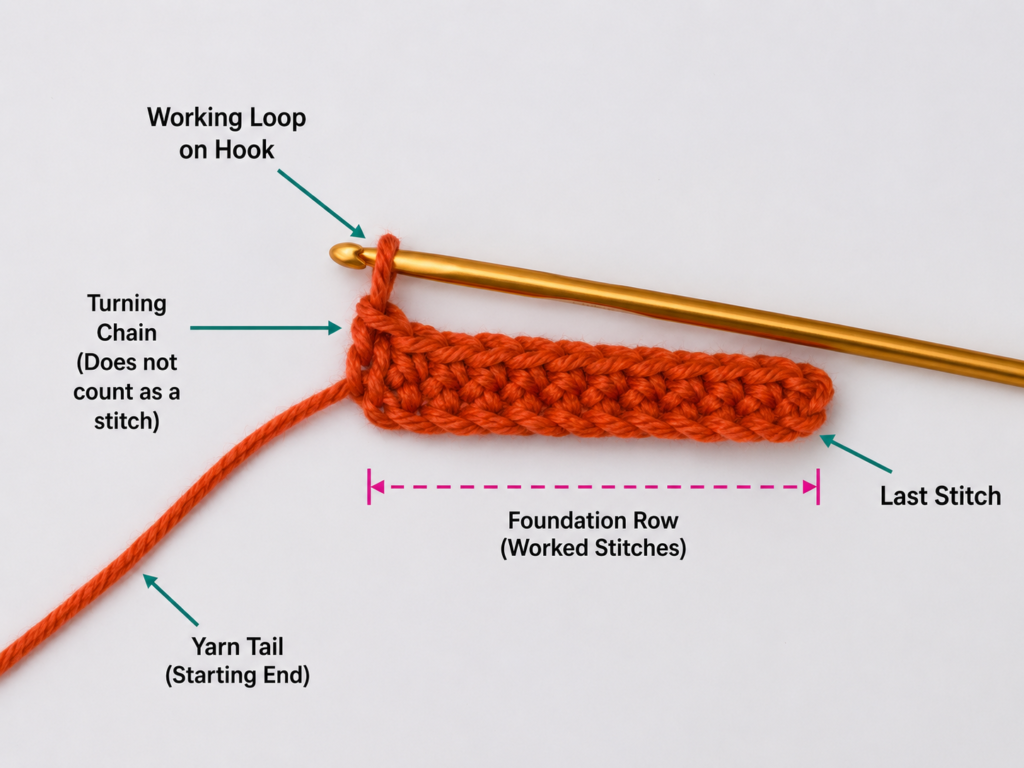
Step 2: Crochet the First Row
Work into the third chain from the hook.
Make:
1 hdc in each remaining chain across.
You should finish with:
19 hdc.
To make one half double crochet:
- Yarn over.
- Insert the hook into the correct chain.
- Yarn over.
- Pull up one loop.
- You now have three loops on the hook.
- Yarn over.
- Pull through all three loops.
The first row forms the base for every raised rib that follows.
Beginner tip:
Count the 19 stitches immediately. Do not wait until Row 10 to discover that the rectangle has gradually become narrower.
Common mistake to avoid:
Missing the final chain.
The last foundation chain can tighten and become difficult to see. Gently spread the chain with your fingers before inserting the hook.
Step 3: Begin the Ribbed Back-Loop Rows
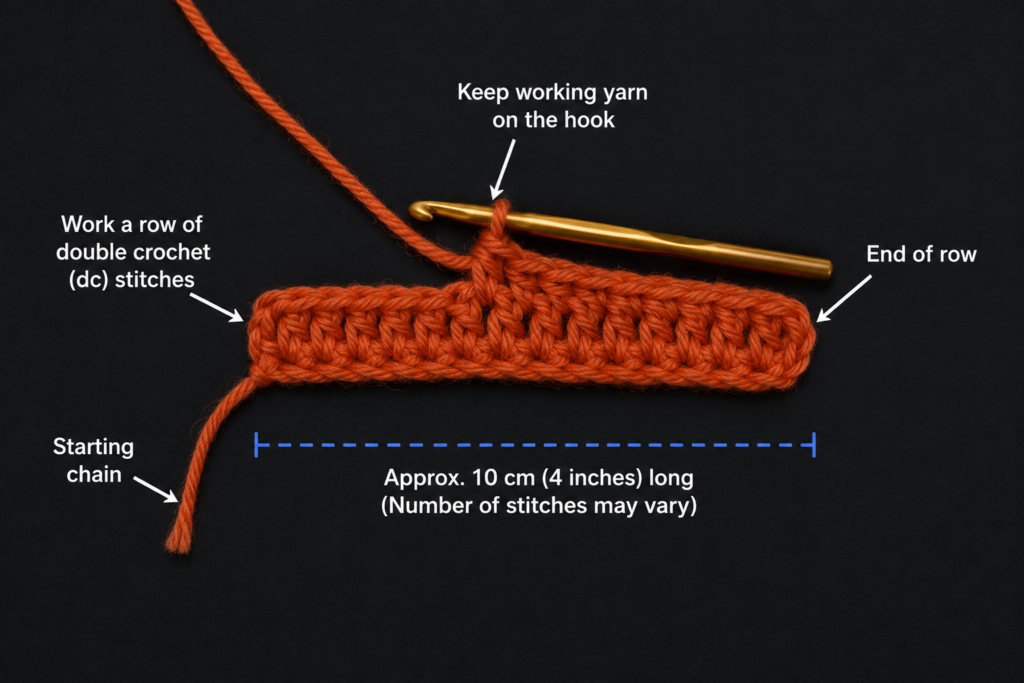
For Row 2:
Ch 2 and turn.
The ch 2 does not count as a stitch.
Work:
1 hdc BLO in each of the 19 stitches across.
To identify the back loop, look at the top of the stitch. You will see a V formed by two loops:
- The loop closest to you is the front loop.
- The loop farther away is the back loop.
Insert the hook under the back loop only.
Leaving the front loop unworked creates the raised horizontal ridge that becomes a vertical pumpkin rib after assembly.
Beginner tip:
After completing three or four rows, lightly stretch the rectangle from side to side. The raised rib lines should become clearly visible.
Common mistake to avoid:
Working through both top loops by habit.
Pause before every insertion until back-loop placement begins to feel natural.
Step 4: Complete the Ribbed Rectangle
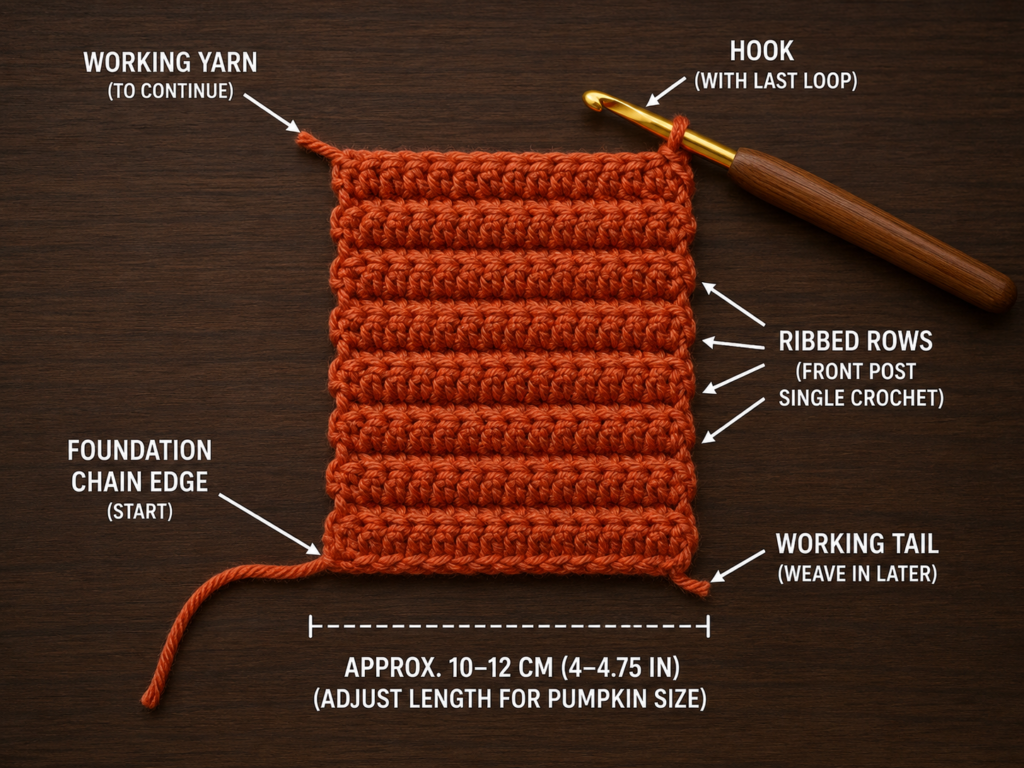
Continue repeating Row 2 until you have completed:
28 rows total.
Every row should contain:
19 hdc BLO.
Lay the rectangle flat.
The approximate dimensions should be around:
8 inches / 20 cm wide
16–18 inches / 41–46 cm long
A little variation is completely acceptable.
More important than exact measurements is proportion. The rectangle should be long enough to wrap into a generously rounded tube rather than a narrow cylinder.
Fasten off, leaving a yarn tail at least 30 inches / 76 cm long for assembly.
Beginner tip:
Count your rows by counting the raised ridges along one side of the fabric.
Common mistake to avoid:
Stopping when the rectangle looks square.
A square will create a narrow, tall pumpkin. For the plump shape described here, the long dimension needs to be substantially longer than the short dimension.
Step 5: Seam the Rectangle into a Tube
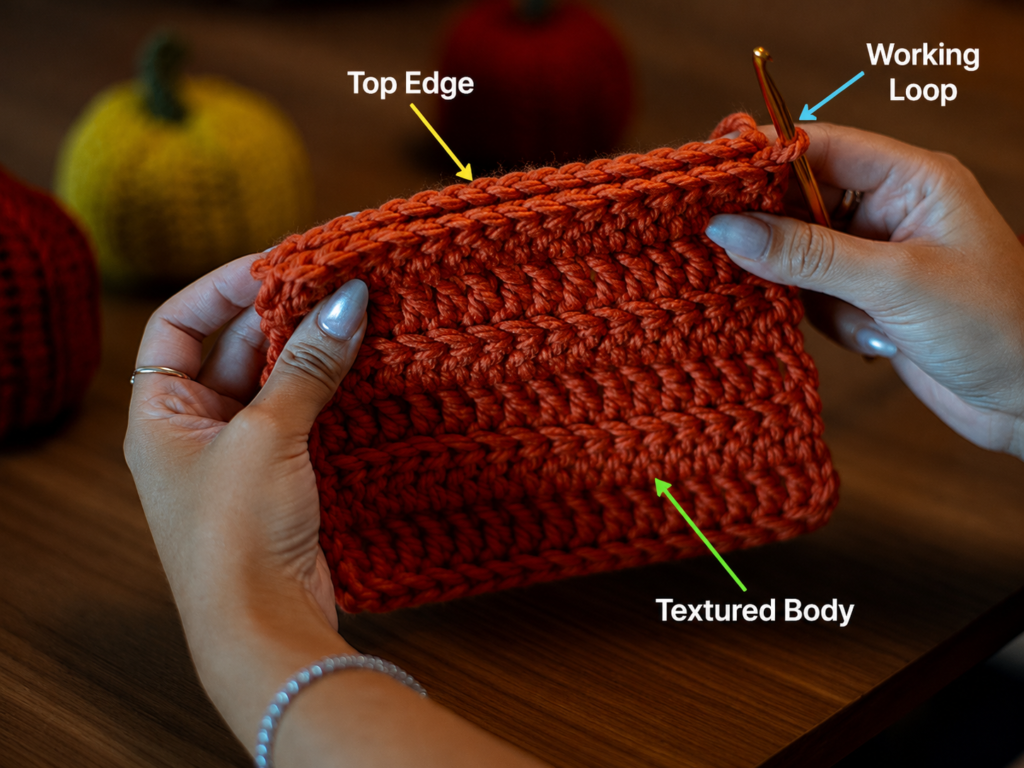
Fold the rectangle so its two short edges meet.
Make sure the raised ribs run from one open edge of the future tube to the other. Those ribs will eventually run vertically from the top of the pumpkin toward the bottom.
Thread the long yarn tail onto a tapestry needle.
Sew the two short edges together.
You can use:
- Whip stitch.
- Mattress stitch.
- A simple back-and-forth seam.
The precise technique matters less than creating a secure join without pulling the seam excessively tight.
Once joined, you should have a crochet tube open at both ends.
Beginner tip:
Match corresponding rows as you sew. One rib on one edge should line up with one rib on the opposite edge.
Common mistake to avoid:
Twisting the rectangle before seaming.
Lay the rectangle flat, fold it deliberately, and check that both edges align before making the first permanent stitch.
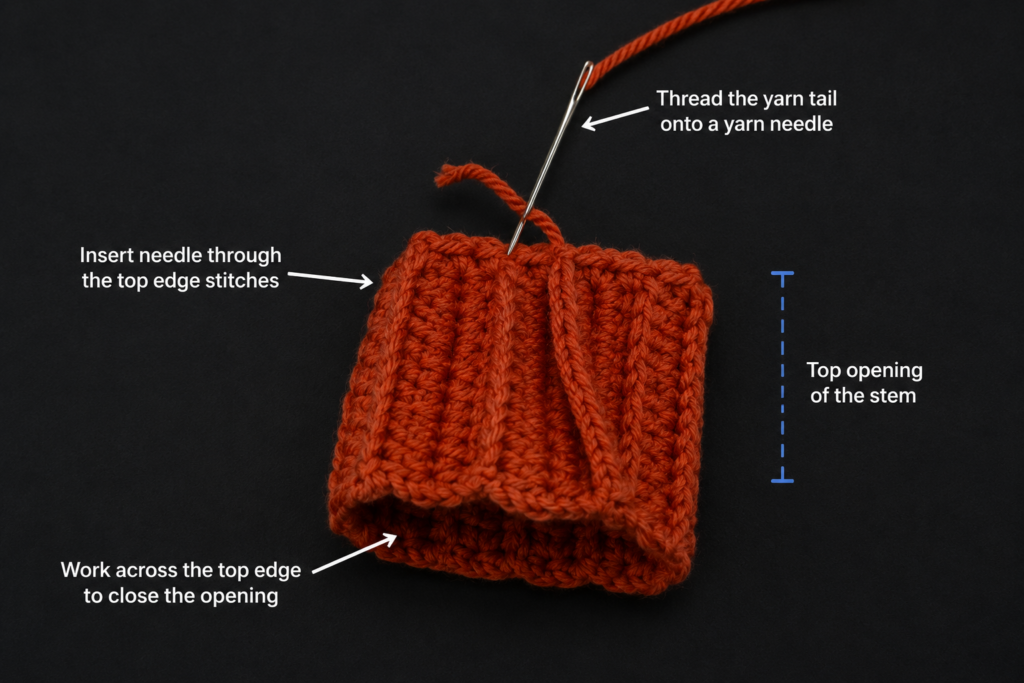
Step 6: Gather and Close the Bottom
Choose one open end to become the bottom.
Thread a long piece of matching terracotta yarn onto the tapestry needle.
Beginning near the seam, weave the needle in and out around the complete edge.
Take reasonably substantial bites of crochet fabric rather than catching only one delicate strand.
Once you return to the starting point:
- Hold both yarn ends.
- Pull steadily.
- Watch the opening shrink.
- Continue until it closes as tightly as possible.
- Sew through the center several times.
- Knot securely on what will become the inside.
Do not worry if a tiny hole remains. The final shaping and stuffing will usually make it visually insignificant.
Beginner tip:
Pull gradually while distributing the gathers evenly with your fingers.
Common mistake to avoid:
Using a very short yarn tail.
Gathering consumes more yarn than many beginners expect. Start with enough yarn to travel around the full opening, tighten it, knot it, and secure it.
Step 7: Turn and Stuff the Pumpkin
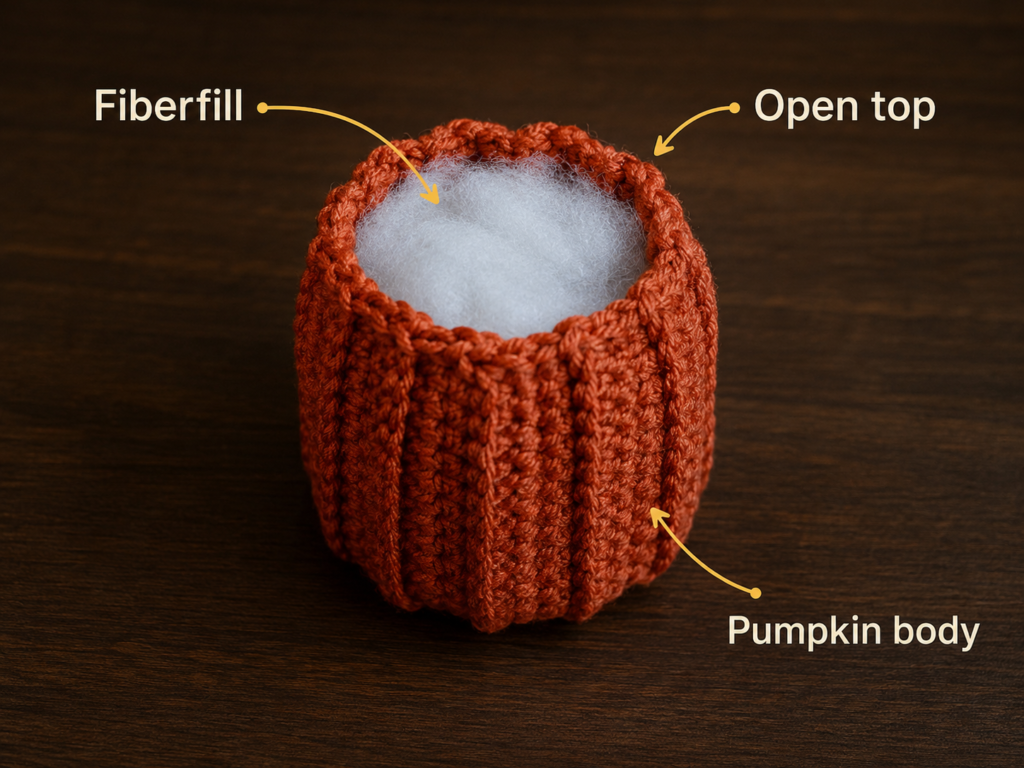
Turn the tube right side out.
Push the closed bottom gently into shape.
Begin adding polyester fiberfill in small pieces.
Do not insert one enormous compact ball. Small portions distribute more evenly and reduce hard lumps.
Fill:
- The outer edges first.
- The center second.
- Any soft gaps last.
Continue until the pumpkin feels plump but still compresses under gentle hand pressure.
For the medium pumpkin, you want enough filling to support the ribbed shape without stretching the crochet fabric so aggressively that large holes appear.
Beginner tip:
Rotate the pumpkin every few handfuls and check the shape from every angle.
Common mistake to avoid:
Overstuffing immediately.
It is much easier to add more filling than to correct a heavily distorted, overstretched pumpkin.
Step 8: Close the Top and Shape the Pumpkin
Thread another long length of matching terracotta yarn onto the tapestry needle.
Make a running stitch around the complete top opening, just as you did at the bottom.
Before pulling completely closed, make one final check:
- Is the stuffing even?
- Are there empty corners?
- Is the pumpkin too hard?
- Does the side seam look acceptable?
Adjust now.
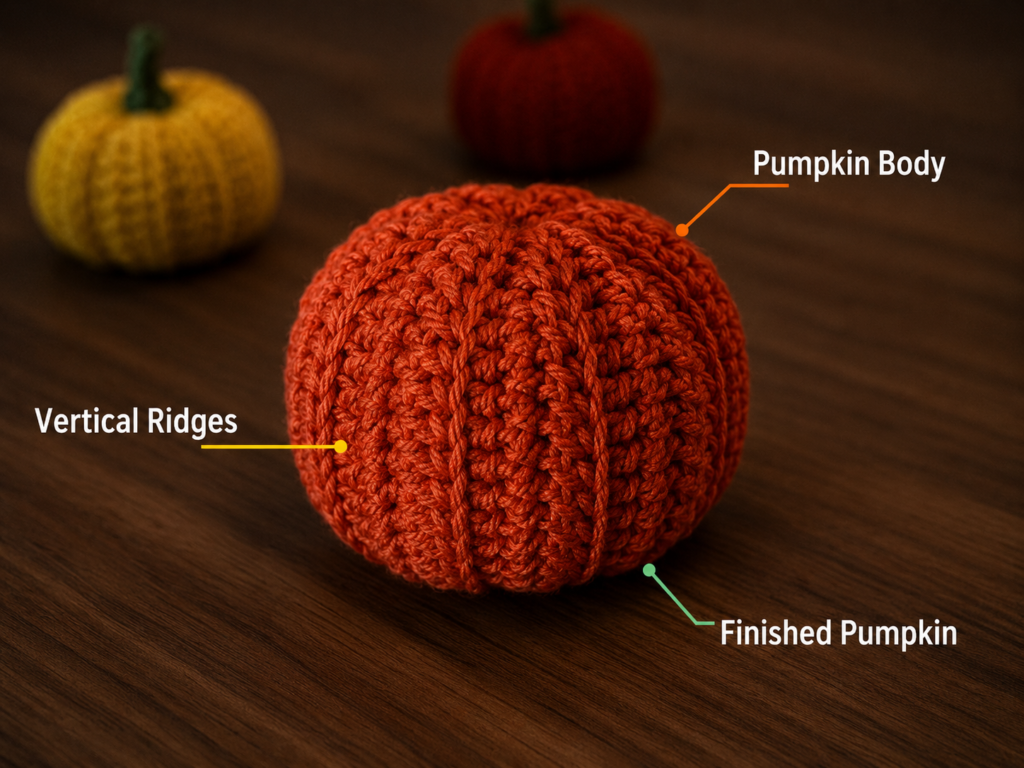
Then pull the top closed.
Secure it with several stitches through the center.
For a more pumpkin-like silhouette, take the needle through the middle from top to bottom and back again once or twice. Pull gently to create a subtle indentation.
Do not over-tighten. The goal is a soft depression rather than a crushed pumpkin.
Optional deeper rib shaping
The back-loop ribbing already creates natural sections.
For deeper grooves, use a long strand of matching yarn:
- Insert the needle through the bottom center.
- Bring it out through the top center.
- Wrap the yarn down the exterior along one existing rib valley.
- Reinsert through the bottom.
- Pull gently.
- Repeat at evenly spaced points.
This is optional.
Beginner tip:
Stop pulling as soon as the shape looks pleasantly rounded. More tension is not always better.
Common mistake to avoid:
Pulling one sculpting strand dramatically tighter than the others.
This creates uneven sections.
Step 9: Crochet the Olive-Green Stem
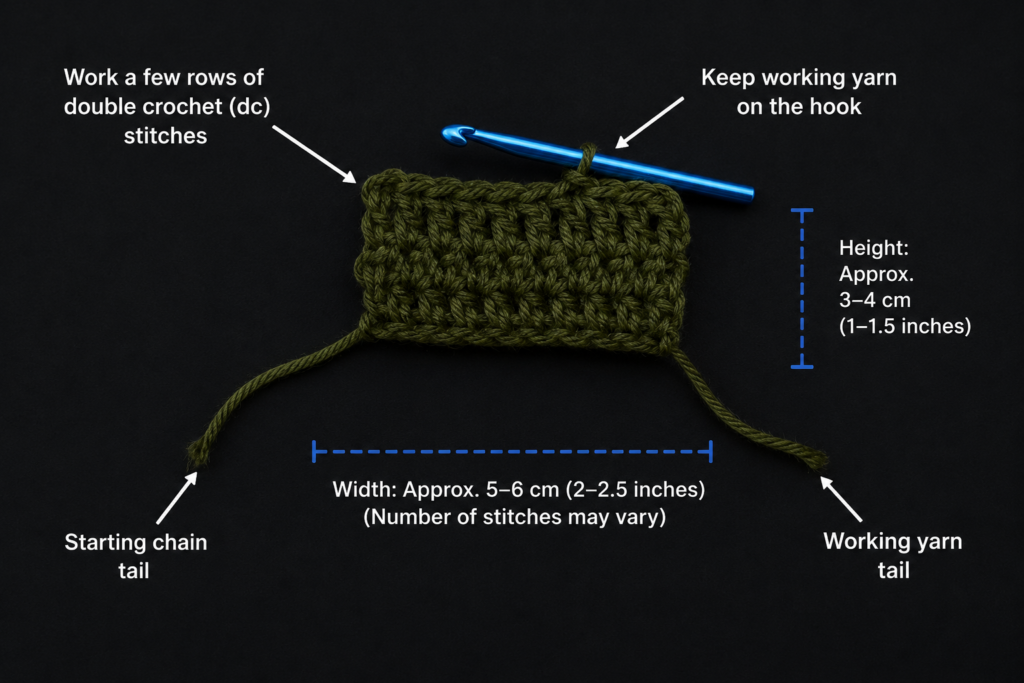
With olive-green yarn:
Ch 7.
Row 1
Beginning in the second chain from the hook:
Sc in each of the next 6 chains.
6 sc
Rows 2–6
Ch 1, turn.
Work:
1 sc in each of the 6 stitches across.
After Row 6, fasten off, leaving a long tail for sewing.
You now have a small dense rectangle.
Roll it from one short edge toward the other to form a compact stem.
Use the yarn tail to sew through the rolled layers several times.
Allow the stem to curve slightly rather than forcing it perfectly straight.
Beginner tip:
A slightly irregular stem often looks more organic than a perfectly cylindrical one.
Common mistake to avoid:
Making the stem too large for the pumpkin.
The stem should complement the pumpkin rather than dominate it.
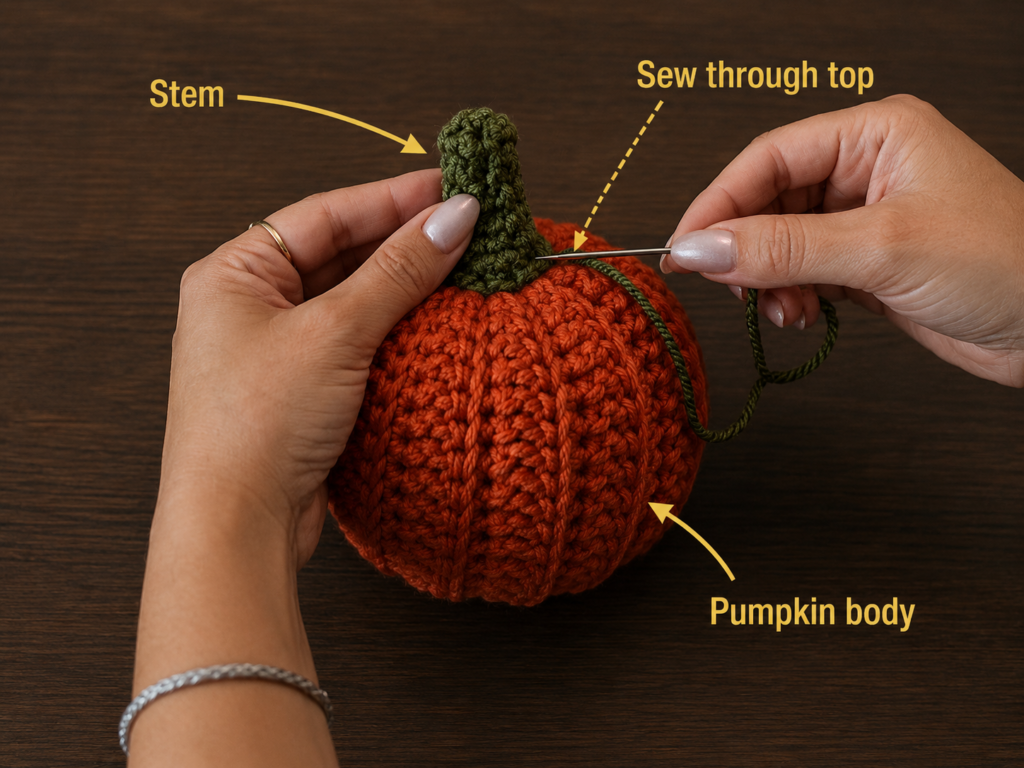
Step 10: Attach the Stem
Position the rolled stem over the top-center indentation.
Before sewing, turn the pumpkin around and look at it from several angles.
Once satisfied:
- Thread the olive yarn tail onto a tapestry needle.
- Pass through the lower stem.
- Pass through a sturdy terracotta stitch near the center.
- Return through the stem.
- Repeat at several points around the base.
The stem should feel secure when gently tugged.
Weave the remaining yarn tail through the pumpkin body and trim.
Beginner tip:
Do not sew only through the surface fibers of the pumpkin yarn. Catch substantial crochet stitches.
Common mistake to avoid:
Attaching the stem off-center before checking the shape from all sides.
Test the position carefully first.
Pattern Notes or Stitch Notes
Turning-chain rule
The beginning ch 2 does not count as a stitch in the pumpkin-body rectangle.
The stem’s beginning ch 1 also does not count as a stitch.
Stitch count
Pumpkin body:
19 hdc per row
Maintain this count through all 28 rows.
Stem:
6 sc per row
Repeat pattern
For the body:
Ch 2, turn, hdc BLO in each stitch across.
Repeat until 28 total rows are complete.
Row notes
The pumpkin body is worked entirely in flat rows.
The rectangle is transformed into a three-dimensional pumpkin only during finishing.
Right side and wrong side
Because the pumpkin is heavily textured and assembled from a reversible ribbed fabric, the visual distinction can be subtle.
Before seaming, choose whichever side looks cleaner as the right side.
Keep knots and untidy tails on the inside.
Size adjustment notes
The pumpkin’s height is primarily affected by the number of starting chains.
The pumpkin’s circumference is primarily affected by the number of rows.
For a smaller pumpkin, try:
- Ch 15.
- Work approximately 20–22 rows.
For a larger pumpkin, try:
- Ch 27.
- Work approximately 34–38 rows.
These are starting suggestions rather than guaranteed final dimensions because yarn, hook, and tension can change the result.
Common Beginner Mistakes
1. Accidentally losing stitches
Problem: The rectangle becomes narrower toward one end.
Likely cause: Missing the first or last stitch of a row.
Fix: Maintain 19 stitches in every row and use stitch markers at both edges.
2. The ribbing disappears
Problem: The fabric looks flat instead of deeply textured.
Likely cause: Working through both loops instead of the back loop only.
Fix: Identify the V at the top of each stitch and insert under only the rear loop.
3. The foundation edge is much tighter than the rest
Problem: One side of the rectangle pulls inward.
Likely cause: Tight starting chains.
Fix: Remake the foundation more loosely or use a slightly larger hook for the chain only.
4. The pumpkin is too tall and narrow
Problem: The final shape resembles a cylinder.
Likely cause: The rectangle did not have enough rows compared with its height.
Fix: Increase the number of rows before seaming.
5. White stuffing shows through
Problem: Visible fiberfill appears between stitches.
Likely cause: Loose tension, oversized hook, or overstuffing.
Fix: Use a smaller hook, reduce stuffing, or choose stuffing closer to the yarn color when appropriate.
6. The gathered opening will not close
Problem: A large hole remains at the top or bottom.
Likely cause: The gathering stitches are too far from the edge or too widely spaced.
Fix: Work another gathering round closer to the opening and take smaller bites through the crochet fabric.
7. The pumpkin is lumpy
Problem: Hard bumps appear around the exterior.
Likely cause: Fiberfill was inserted in large compressed pieces.
Fix: Remove some stuffing and reinsert it in smaller separated handfuls.
8. The stem feels loose
Problem: It tilts excessively or pulls away.
Likely cause: Too few attachment points.
Fix: Sew around the complete base using several sturdy pumpkin stitches.
How to Customize This Crochet Project
Change the yarn
You can make this pumpkin with:
- Medium worsted yarn.
- Bulky yarn.
- Super-bulky yarn.
- Chenille yarn.
- Wool blends.
- Acrylic.
- Cotton blends.
Changing yarn weight will change the finished dimensions, texture, drape, stitch visibility, and ideal hook size. The Craft Yarn Council explicitly notes that yarns within the same standardized weight category are not automatically interchangeable, so assess gauge and fabric behavior when substituting.
Try different fall colors
A pumpkin does not have to be orange.
Try:
- Burnt terracotta.
- Oatmeal.
- Soft cream.
- Mustard.
- Olive green.
- Burgundy.
- Dusty blue.
- Warm taupe.
- Deep brown.
- Muted pink.
For a coordinated trio, use one yarn brand in three colors.
Make a smaller pumpkin
Reduce:
- Starting chains.
- Total rows.
- Stuffing.
Mini pumpkins work well for:
- Tiered trays.
- Place settings.
- Garland.
- Gift toppers.
- Teacher gifts.
- Small shelf décor.
Make a giant floor pumpkin
Use:
- Super-bulky yarn.
- A larger hook suitable for the yarn.
- More chains.
- More rows.
- Considerably more fiberfill.
Keep the crochet fabric dense enough to contain the filling.
Change the stem
Instead of the olive crochet stem, consider:
- A small natural twig.
- A cinnamon stick used decoratively.
- A rolled rectangle in brown yarn.
- A cork.
- A braided yarn cord.
- A tightly crocheted tube.
For households with small children or pets, avoid detachable hard components that may become a choking hazard.
Add a leaf
Crochet a small olive, mustard, or sage leaf and sew it beside the stem.
A leaf can add more color without changing the pumpkin body.
Add a curly vine
Make:
Ch 20–30.
Work several stitches into each chain to encourage a spiral.
Sew the vine beside the stem.
Add deeper pumpkin sections
Use a long tapestry needle and matching yarn to wrap around the pumpkin’s natural rib valleys.
Pull gently.
This creates more pronounced divisions.
Gift ideas and use cases
A finished crochet pumpkin can work as:
- Fall mantel décor.
- Thanksgiving centerpiece decoration.
- Hostess gift.
- Teacher gift.
- Office desk décor.
- Autumn market item.
- Shelf decoration.
- Seasonal housewarming gift.
- Table-place setting accent in a miniature size.
Finishing Instructions
Fastening off
After completing the final stitch:
- Cut the yarn, leaving the required sewing tail.
- Pull the cut end completely through the active loop.
- Tighten gently.
Do not trim tails needed for assembly.
Weaving in ends
For tails that are not used in construction:
- Thread the yarn onto a tapestry needle.
- Pass through several nearby stitches on the wrong side.
- Change direction.
- Pass through several additional stitches.
- Trim close to the fabric.
Blocking
Traditional flat blocking is usually unnecessary after the pumpkin is stuffed.
However, before assembly, you can lightly shape the rectangle if the ribbing is severely distorted.
Always use a treatment suitable for the yarn fiber.
Shaping
Once the pumpkin is complete:
- Press gently around the circumference.
- Redistribute stuffing by hand.
- Flatten the bottom slightly so the pumpkin sits securely.
- Adjust the top indentation.
- Curve the stem naturally.
Avoid aggressive pulling that could damage seams.
Washing and care
Follow the care instructions for the specific yarn you used.
For a stuffed decorative project, spot cleaning is often the easiest option. If full washing is necessary and the yarn permits it, reshape carefully while damp and allow the pumpkin to dry completely before storage.
Store seasonal crochet decorations only when thoroughly dry.
Quick Printable-Style Summary
Project: Easy Ribbed Fall Crochet Pumpkin
Skill level: Beginner to Easy
Finished size: Approximately 9 inches wide × 6 inches high
Yarn: Bulky-weight yarn in terracotta; small amount of olive yarn for stem
Hook: 6 mm / J-10
Other materials: Fiberfill, tapestry needle, scissors, measuring tape
Main stitches: Ch, hdc, hdc BLO, sc
Pumpkin Body
Ch 21.
Row 1: Hdc in third ch from hook and each remaining chain across. 19 hdc.
Row 2: Ch 2, turn. Hdc BLO in each of 19 sts across.
Rows 3–28: Repeat Row 2.
Fasten off, leaving a long sewing tail.
Assembly
- Fold short edges together.
- Sew into a tube.
- Gather one opening closed.
- Turn right side out.
- Stuff evenly.
- Gather second opening.
- Shape gently.
Stem
Ch 7.
Row 1: Sc in second ch from hook and each remaining chain. 6 sc.
Rows 2–6: Ch 1, turn, sc across.
Fasten off with long tail, roll into stem shape, secure, and sew to pumpkin.
Finishing
Weave in ends, redistribute stuffing, flatten the bottom slightly, shape the top indentation, and adjust the stem.
FAQ
Are fall crochet patterns good for beginners?
Some are particularly beginner-friendly. Projects made from basic stitches and simple shapes, such as a pumpkin constructed from a rectangle, eliminate many complications associated with detailed shaping. The Craft Yarn Council describes basic projects as those using basic stitches, while easy projects may include simple stitch patterns or shaping.
What is the easiest crochet pumpkin pattern for beginners?
One of the simplest constructions begins with a flat rectangle. After crocheting the rectangle, the short edges are joined into a tube, the openings are gathered, the piece is stuffed, and a stem is added. This is also the construction logic demonstrated by the selected primary visual source.
What stitch makes good crochet pumpkin ribs?
Working half double crochet through the back loop only creates distinct raised lines because the unused front loops form visible ridges. Other stitches can also create ribbing, including single crochet BLO and double crochet BLO.
Can I use worsted-weight yarn instead of bulky yarn?
Yes, but the final pumpkin will usually be smaller when the same stitch and row counts are used. You may need a different hook size and additional chains or rows depending on your desired dimensions. Standard yarn-weight categories are guidelines rather than guarantees that all yarns within a category behave identically.
How much stuffing should I use?
Add enough stuffing for a plump shape while keeping the fabric flexible enough to indent at the top and bottom. Stop before the crochet stretches so severely that large gaps expose the filling.
Can I make these pumpkins in several sizes?
Yes. Change the foundation-chain length to adjust height and change the number of rows to adjust circumference.
For a coordinated collection, keep the same yarn and hook while varying only the rectangle dimensions.
Do I need to block a crochet pumpkin?
Usually not after assembly. The filling itself helps shape the three-dimensional project. Lightly shaping the flat rectangle before seaming can be useful if your tension has created significant distortion.
Conclusion
The best fall crochet patterns do not have to be complicated.
This ribbed pumpkin begins with a chain, grows into a simple rectangle, and becomes a three-dimensional autumn decoration through a few carefully explained finishing steps.
The project also gives beginners useful practice with techniques that transfer directly to future crochet work:
- Maintaining straight edges.
- Counting stitches.
- Working in the back loop.
- Creating textured fabric.
- Measuring proportions.
- Seaming.
- Gathering.
- Stuffing.
- Shaping.
- Sewing separate components securely.
Start with one burnt-terracotta pumpkin and learn the construction. Then try a smaller oatmeal pumpkin, a mustard version, or an oversized olive-green one.
A small group made in coordinated autumn shades can turn one simple beginner pattern into a complete handmade fall display.