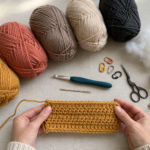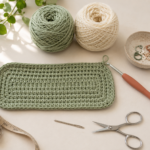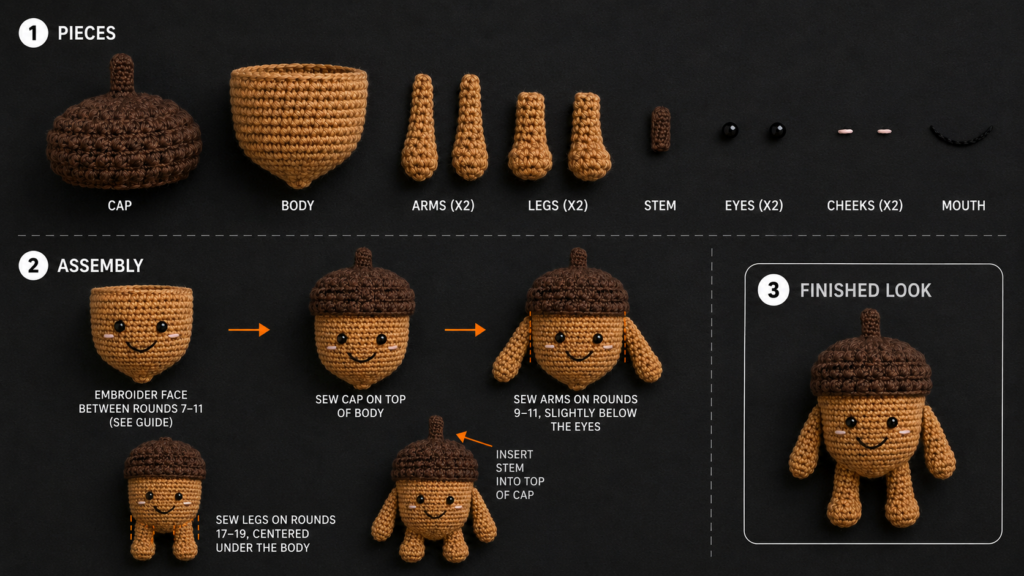
There is something especially satisfying about turning a small amount of leftover yarn into a finished crochet project in one afternoon. This easy crochet acorn pattern is designed for exactly that kind of project: small enough to finish quickly, practical for using yarn scraps, and simple enough for a beginner who is ready to move beyond flat practice swatches.
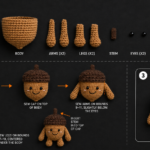
You will begin at the pointed bottom of the acorn and crochet upward in continuous rounds. Gradual increases create the rounded nut shape. A few straight rounds add height, decreases close the upper opening, and a small amount of stuffing gives the acorn its three-dimensional form.
The cap is crocheted separately in dark-brown yarn, which makes the construction easier to understand and allows you to position the cap before sewing it permanently in place. A short crocheted stem completes the classic woodland shape.
The finished acorn can become:
- Fall bowl filler.
- Autumn garland decoration.
- Wreath accent.
- Thanksgiving table decoration.
- Gift topper.
- Bag charm.
- Keychain.
- Woodland nursery décor.
- Seasonal shelf decoration.
The project uses basic single crochet plus straightforward increases and decreases. Under the Craft Yarn Council’s general project-level framework, projects using basic stitches and simple increases or decreases fall at the lower end of crochet complexity, although working in three dimensions and sewing pieces together may still be new skills for a complete beginner.
This tutorial explains each stage carefully and includes multiple image placements so you can check the developing shape as you work.
What You’ll Learn
By completing this crochet acorn pattern, you will practice how to:
- Start with a magic ring.
- Crochet in continuous rounds.
- Use a stitch marker.
- Make a single crochet increase.
- Work an invisible decrease.
- Shape a pointed amigurumi base.
- Maintain a consistent stitch count.
- Add optional embroidered or safety eyes.
- Stuff a crochet shape evenly.
- Close an amigurumi opening neatly.
- Crochet a separate acorn cap.
- Work in the back loop only for subtle texture.
- Make a short crochet stem.
- Sew two crochet pieces together securely.
- Weave in ends so they remain hidden.
Materials You’ll Need
For one approximately 4.5-inch crochet acorn:
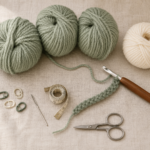
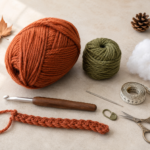
- Approximately 30–40 yards of worsted-weight yarn in caramel brown
- Approximately 15–20 yards of worsted-weight yarn in dark espresso brown
- 3.5 mm / E-4 crochet hook
- Small amount of polyester fiber stuffing
- Locking stitch marker
- Blunt tapestry needle
- Small scissors
- Optional black embroidery thread
- Optional embroidery needle
- Optional 6 mm safety eyes
- Optional wooden chopstick or blunt stuffing tool
The Craft Yarn Council categorizes worsted and Aran yarns within the medium-weight yarn family, though actual yarn thickness can differ between brands.
The 3.5 mm hook is intentionally somewhat small for typical worsted-weight yarn. Amigurumi generally benefits from dense fabric because large gaps can allow stuffing to show. Always prioritize your actual fabric density rather than relying exclusively on a yarn-label recommendation.
Metric hook size is the most reliable specification because letter and number designations may vary among manufacturers.
Finished Size
Using worsted-weight yarn and a 3.5 mm hook, the sample acorn should measure approximately:
4–4.5 inches / 10–11.5 cm tall, including the stem
and approximately:
2.5–3 inches / 6.5–7.5 cm across at its widest point.
The exact size will depend on:
- Your yarn.
- Your hook.
- Your tension.
- How firmly you stuff the acorn.
Gauge is not critical for decorative amigurumi, but dense, consistent stitches are important.
Crochet Abbreviations Used
This tutorial uses U.S. crochet terminology:
- ch = chain
- sc = single crochet
- sl st = slip stitch
- st/sts = stitch/stitches
- rnd/rnds = round/rounds
- inc = increase
- dec = decrease
- BLO = back loop only
- FLO = front loop only
- rep = repeat
These abbreviations correspond with the Craft Yarn Council’s standardized crochet abbreviation list.
U.S./U.K. terminology note
This article uses U.S. terminology.
A U.S. single crochet is called a double crochet in standard U.K. terminology.
Before You Start
Understand continuous rounds
The main acorn body is crocheted in a spiral.
You do not join each round with a slip stitch unless the instructions specifically say to do so.
Place a stitch marker in the first stitch of every round and move it upward whenever a new round begins.
Without a marker, it is very easy to lose your starting point.
How to count your stitches
The number in parentheses at the end of each round tells you exactly how many stitches you should have.
For example:
Round 3: [sc in next st, inc in next st] 5 times. (15 sts)
This means that after completing the entire round, you should count 15 stitches.
Count before continuing when:
- A round contains increases.
- A round contains decreases.
- Your shape begins looking uneven.
- You are unsure whether you skipped a stitch.
How to make an increase
For this pattern:
inc = work 2 single crochets into the same stitch.
One stitch from the previous round therefore becomes two stitches in the new round.
How to make an invisible decrease
For a cleaner amigurumi finish:
- Insert your hook through the front loop of the next stitch.
- Without yarning over, insert through the front loop of the following stitch.
- Yarn over.
- Pull through the first two loops.
- Yarn over again.
- Pull through both remaining loops.
Two stitches become one.
How tight should the fabric be?
The stitches should be firm enough that white stuffing cannot easily show between them.
However, avoid crocheting so tightly that:
- Your hands become sore.
- The hook is difficult to insert.
- The stitches become distorted.
- Every decrease feels impossible.
If your fabric has obvious holes, try a slightly smaller hook.
If working every stitch is difficult, move up by 0.5 mm.
Choosing colors
Traditional acorn colors include:
- Tan + dark brown.
- Caramel + espresso.
- Golden brown + chocolate.
- Cream + taupe.
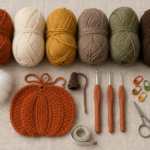
For modern fall décor, try:
- Burnt orange + mocha.
- Mustard + walnut.
- Sage + warm brown.
- Rust + oatmeal.
- Dusty terracotta + dark cocoa.
For visual consistency, use the same cap color across a group of multicolored acorns.
Step-by-Step Crochet Tutorial
Step 1: Start the Pointed Acorn Body
Using caramel-brown yarn, make a magic ring.
Round 1
Work 5 sc into the magic ring.
Pull the starting yarn tail carefully to close the center.
Stitch count: 5
Place a locking stitch marker in the first stitch.
Round 2
Work:
2 sc in each stitch around.
Stitch count: 10
Round 3
Work:
[1 sc in next st, inc in next st] 5 times.
Stitch count: 15
At this stage, the work will still be small, but the point of the acorn is beginning to develop.
Beginner tip:
Do not turn the work. Continue traveling in the same direction around the spiral.
Common mistake to avoid:
Crocheting into the initial yarn tail instead of a real stitch.
Before continuing, identify the V-shaped top loops of each stitch clearly.
Step 2: Increase to the Widest Part
Round 4
Work:
[sc in each of the next 2 sts, inc in next st] 5 times.
Stitch count: 20
Round 5
Work:
[sc in each of the next 3 sts, inc in next st] 5 times.
Stitch count: 25
The acorn should now be wider than it was at the pointed beginning.
Do not worry if it resembles a small cup rather than an acorn yet. The recognizable silhouette develops after several even rounds.
Beginner tip:
Count each repeat as a group.
For Round 5, one complete group contains:
- Three normal single crochets.
- One increase.
You repeat that group five times.
Common mistake to avoid:
Placing all increases randomly.
Evenly distributed increases produce smoother shaping.
Step 3: Build the Rounded Body
Rounds 6–10
Work:
Sc in each of the 25 stitches around.
Do not increase.
Do not decrease.
Maintain:
25 stitches per round.
After five even rounds, the project should have a clearly three-dimensional shape with:
- A softly pointed lower section.
- A rounded middle.
- Straight but gently curving upper sides.
The fabric may curl inward naturally. This is normal for amigurumi.
Beginner tip:
Stop after Round 8 and count your stitches. If you have 24 or 26 instead of 25, find the error before crocheting several additional rounds.
Common mistake to avoid:
Accidentally adding a stitch where the rounds meet.
Remember that continuous rounds have no joining slip stitch. The stitch marker identifies where one round finishes and the next begins.
Step 3: Build the Rounded Body
Rounds 6–10
Work:
Sc in each of the 25 stitches around.
Do not increase.
Do not decrease.
Maintain:
25 stitches per round.
After five even rounds, the project should have a clearly three-dimensional shape with:
- A softly pointed lower section.
- A rounded middle.
- Straight but gently curving upper sides.
The fabric may curl inward naturally. This is normal for amigurumi.
Beginner tip:
Stop after Round 8 and count your stitches. If you have 24 or 26 instead of 25, find the error before crocheting several additional rounds.
Common mistake to avoid:
Accidentally adding a stitch where the rounds meet.
Remember that continuous rounds have no joining slip stitch. The stitch marker identifies where one round finishes and the next begins.
Step 4: Add Optional Facial Details
A plain acorn is ideal for sophisticated seasonal décor.
For a cute amigurumi version, add facial details before decreasing the opening too far.
Safety-eye option
Position two 6 mm safety eyes between Rounds 8 and 9, approximately five stitches apart.
Before attaching the backs permanently, hold the acorn upright and check:
- Are the eyes level?
- Are they centered?
- Is there enough space for an optional mouth?
Embroidered-eye option
Using black embroidery thread:
- Thread an embroidery needle.
- Make one short vertical stitch for each eye.
- Repeat once if you want slightly thicker eyes.
- Secure the thread inside.
Important safety note
The selected primary source explicitly warns that safety eyes can present a choking hazard and are unsuitable for children under three; embroidered eyes are the safer alternative for items intended for very young children.
For décor that will remain out of children’s reach, you may simply omit facial features entirely.
Beginner tip:
Photograph your eye placement before permanently installing the backs. A quick phone photograph can make uneven placement easier to notice.
Common mistake to avoid:
Waiting until the acorn is completely stuffed and closed before inserting safety eyes.
Once the body is closed, you cannot access the interior to attach the safety backs.
Step 5: Begin Decreasing and Add Stuffing
Round 11
Work:
[sc in each of the next 3 sts, dec] 5 times.
Stitch count: 20
Round 12
Work:
Sc in each stitch around.
Stitch count: 20
Now begin stuffing.
Add small amounts of polyester stuffing rather than one large lump.
Start by filling the pointed bottom.
Use your finger or a blunt wooden tool to push stuffing gently into the tip.
Then add enough to fill the rounded middle.
The acorn should feel:
- Firm.
- Even.
- Three-dimensional.
It should not feel:
- Rock hard.
- Distorted.
- Stretched until stuffing becomes visible.
Beginner tip:
Roll very small pieces of stuffing between your fingertips before placing them into the pointed bottom.
Common mistake to avoid:
Overstuffing too early.
Too much filling can make the remaining decrease rounds difficult to crochet.
Step 6: Close the Acorn Body
Continue decreasing.
Round 13
Work:
[sc in each of the next 2 sts, dec] 5 times.
Stitch count: 15
Add a final small amount of stuffing if needed.
Round 14
Work:
[sc in next st, dec] 5 times.
Stitch count: 10
Round 15
Work:
5 decreases around.
Stitch count: 5
Cut the yarn, leaving approximately an 8-inch tail.
Pull the tail completely through the active loop.
Thread it onto a tapestry needle.
Pass the needle through the front loop of each of the remaining five stitches.
Pull gently.
The opening should draw closed like a small drawstring.
Insert the needle through the center of the closed opening and bring it out through the side of the acorn.
Pull gently, trim the yarn close to the fabric, and massage the body so the cut end disappears inside.
Beginner tip:
Before final closure, make sure the acorn feels evenly filled. Once the five-stitch opening is closed, adding more stuffing becomes difficult.
Common mistake to avoid:
Cutting the yarn tail too short.
An 8-inch tail gives you enough room to thread a needle, close the opening, secure it, and hide the end.
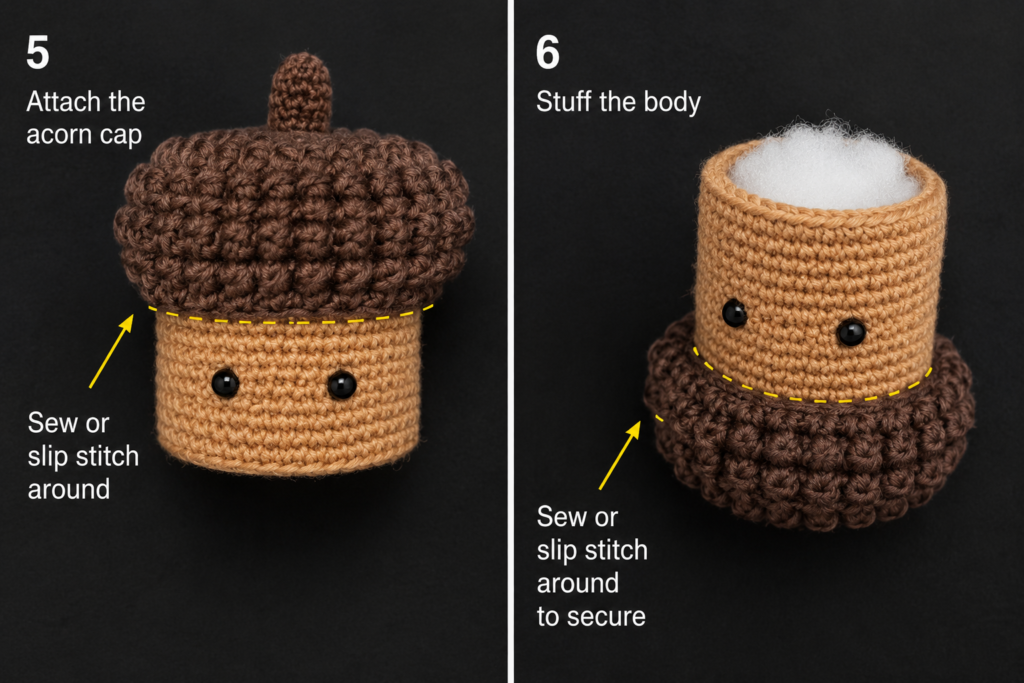
Step 7: Crochet the Dark-Brown Acorn Cap
Using espresso-brown yarn, make a magic ring.
Round 1
Work:
6 sc into the magic ring.
Stitch count: 6
Round 2
Work:
Inc in every stitch around.
Stitch count: 12
Round 3
Work:
[sc in next st, inc in next st] 6 times.
Stitch count: 18
Round 4
Work:
[sc in each of the next 2 sts, inc in next st] 6 times.
Stitch count: 24
Round 5
Work:
[sc in each of the next 3 sts, inc in next st] 6 times.
Stitch count: 30
Round 6
Work in the back loops only:
Sc BLO in each stitch around.
Stitch count: 30
The unworked front loops create a subtle circular ridge.
Round 7
Work:
Sc in each stitch around.
Stitch count: 30
Slip stitch into the next stitch and fasten off, leaving approximately 18 inches of yarn for sewing.
The cap should resemble a shallow bowl.
Place it over the upper part of the caramel body.
It should overlap approximately the upper quarter to upper third of the nut.
Beginner tip:
Do not sew immediately. Rotate the cap until it sits evenly from every angle.
Common mistake to avoid:
Crocheting Round 6 through both loops.
That will still make a usable cap, but you will lose the raised ridge created by the unused front loops.
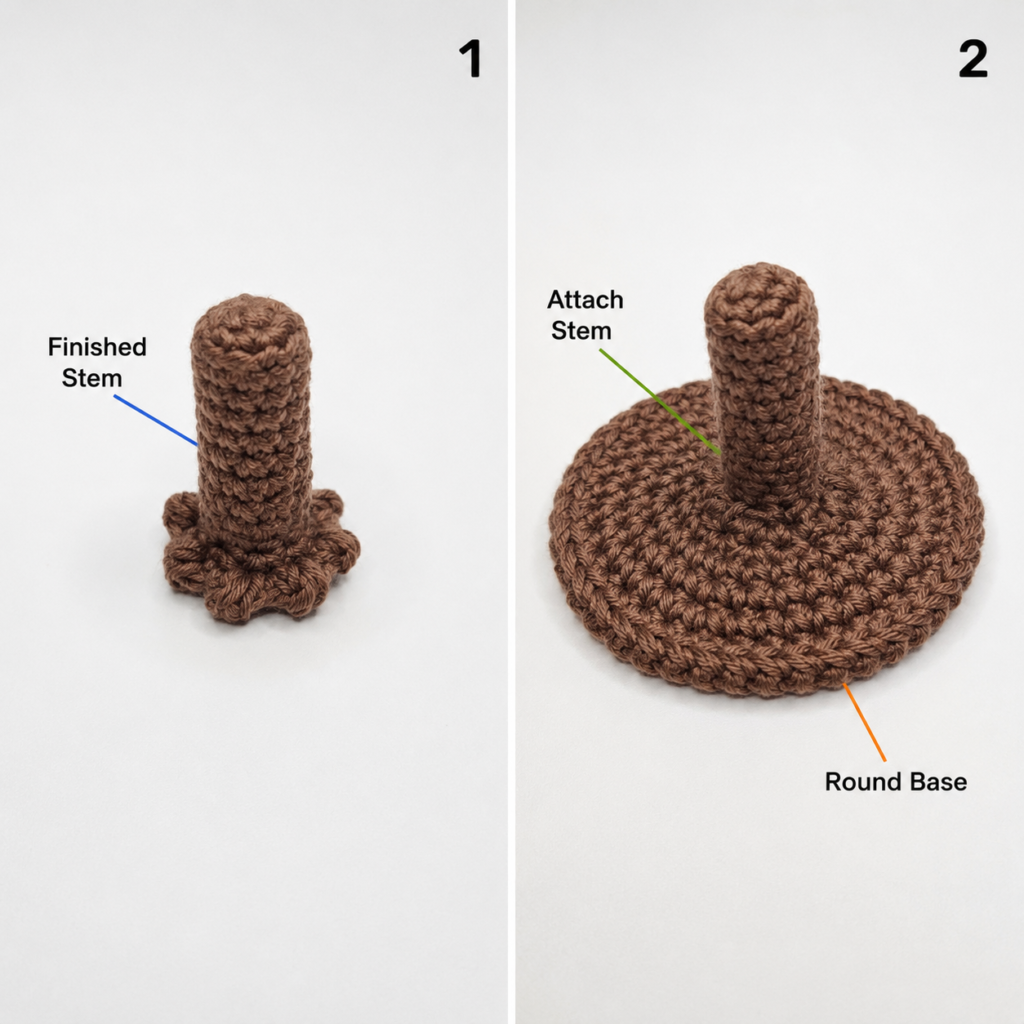
Step 8: Crochet the Stem
Using espresso-brown yarn:
Ch 6.
Starting in the second chain from the hook:
Sl st in each of the next 5 chains.
Fasten off, leaving approximately 8 inches of yarn for sewing.
You now have a short flexible crochet stem.
Position one end at the center top of the cap.
Thread the sewing tail onto your tapestry needle.
Pass through several secure cap stitches until the stem no longer moves easily.
Weave the tail through the wrong side of the cap.
Beginner tip:
Keep your foundation chain relaxed. Tight chains can make the stem curl sharply.
Common mistake to avoid:
Attaching the entire stem flat against the cap.
Only secure its lower end so most of the stem remains visible.
Step 9: Sew the Cap onto the Body
Position the dark-brown cap over the caramel body.
Check the acorn from:
- Front.
- Back.
- Left side.
- Right side.
The cap should sit evenly.
Using the long dark-brown sewing tail and a tapestry needle:
- Insert the needle through one stitch along the cap edge.
- Catch a small portion of the caramel body directly underneath.
- Bring the needle back through the next cap stitch.
- Pull gently.
- Continue around the entire circumference.
Keep your tension firm enough to secure the cap but not so tight that the dark edge puckers.
When you reach the starting point:
- Make one small securing stitch.
- Pass the needle beneath several nearby stitches.
- Change direction.
- Weave beneath several more stitches.
- Trim the excess.
Beginner tip:
Use pins or locking stitch markers to temporarily secure four opposite points of the cap before sewing.
This prevents the cap from slowly shifting to one side.
Common mistake to avoid:
Pulling every sewing stitch extremely tight.
This can create dents in the stuffed body.
Step 10: Add an Optional Embroidered Face
For a cute amigurumi version, use black embroidery thread to make a small mouth.
A simple smile is enough:
- Bring the needle out approximately one round below the eyes.
- Insert it several stitches away to create one horizontal strand.
- Bring the needle out at the center beneath that strand.
- Catch the center gently to pull it downward into a smile.
- Secure all thread ends inside the acorn.
For cheeks, use one or two short stitches of pale pink yarn.
For a minimalist fall-décor version, skip the face completely.
Pattern Notes or Stitch Notes
Turning-chain rules
No turning chain is used in the acorn body because it is crocheted in continuous spiral rounds.
The cap is also worked in continuous rounds.
Stitch counts
Body
- Round 1: 5 sts.
- Round 2: 10 sts.
- Round 3: 15 sts.
- Round 4: 20 sts.
- Round 5: 25 sts.
- Rounds 6–10: 25 sts each.
- Round 11: 20 sts.
- Round 12: 20 sts.
- Round 13: 15 sts.
- Round 14: 10 sts.
- Round 15: 5 sts.
Cap
- Round 1: 6 sts.
- Round 2: 12 sts.
- Round 3: 18 sts.
- Round 4: 24 sts.
- Round 5: 30 sts.
- Rounds 6–7: 30 sts each.
Repeat patterns
When instructions appear inside brackets, repeat the complete bracketed sequence the specified number of times.
Example:
[3 sc, inc] 5 times
means:
- Single crochet in three consecutive stitches.
- Work two single crochets into the next stitch.
- Repeat that complete sequence five times.
Right side and wrong side
For the body, the right side faces outward.
For the cap, keep the normal crochet surface facing outward and the yarn tails hidden underneath.
Size adjustment notes
The easiest way to change the finished size is to change yarn thickness rather than redesigning all stitch counts.
For a smaller acorn:
- Use DK yarn.
- Try a 2.5–3 mm hook.
For a larger acorn:
- Use bulky yarn.
- Select a hook small enough to create dense fabric.
Changing yarn weight changes the final dimensions. The Craft Yarn Council cautions that yarns within the same broad weight category are not always directly interchangeable, so working a sample is useful when exact measurements matter.
Common Beginner Mistakes
1. Losing the beginning of the round
Problem: You no longer know where one round ends and another begins.
Fix: Always keep a locking stitch marker in the first stitch and move it immediately after working that stitch.
2. The pointed bottom is crooked
Problem: The beginning leans dramatically to one side.
Likely cause: Uneven tension or incorrectly placed increases.
Fix: Recount Rounds 1–5 and verify counts of 5, 10, 15, 20, and 25.
3. Stuffing shows between stitches
Problem: White fibers are visible through the crochet fabric.
Fix: Use a smaller hook or slightly firmer tension. Avoid overstuffing.
4. The acorn body is too hard
Problem: The piece feels stiff and distorted.
Fix: Remove some filling before closing. The fabric should be full but not stretched beyond its natural capacity.
5. The invisible decreases leave gaps
Problem: Large holes appear around the upper body.
Fix: Confirm that you are catching only the two front loops before completing the decrease.
6. The cap looks too large
Problem: It covers most of the nut body.
Fix: Position it higher before sewing. For a dramatically smaller fit, omit Round 5 and redesign the final cap circumference carefully.
7. The cap slips while sewing
Problem: One side slowly becomes lower than the other.
Fix: Secure the cap at four evenly spaced points with stitch markers or pins before sewing around it.
8. The stem curls too much
Problem: The short stem coils into a tight spiral.
Fix: Remake the initial chain more loosely and keep the slip stitches relaxed.
How to Customize This Crochet Project
Change the yarn
Smooth cotton creates crisp stitch definition.
Acrylic is soft, widely available, and often comes in a large color range.
A wool blend can create a rustic woodland appearance.
Avoid very fuzzy yarn for your first amigurumi project because it can make individual stitches difficult to see.
Change the colors
Traditional combinations:
- Caramel + chocolate.
- Tan + dark brown.
- Cream + taupe.
Modern autumn combinations:
- Terracotta + espresso.
- Mustard + walnut.
- Olive + mocha.
- Pumpkin orange + dark cocoa.
- Dusty rose + mushroom brown.
For a playful collection, make five different nut colors and use the same dark cap for each.
Make a mini version
Use:
- Sport or DK yarn.
- Smaller hook.
- Less stuffing.
The same stitch structure will produce a smaller project, although the exact finished dimensions will depend on the particular yarn and tension.
Make a chunky acorn
Use:
- Bulky or super-bulky yarn.
- A suitably sized hook that still creates dense fabric.
A large acorn can become:
- Shelf décor.
- Mantel decoration.
- Autumn centerpiece.
- Nursery accent.
Add texture to the cap
Once you are comfortable with the beginner version, experiment with:
- Surface slip stitches.
- Bobble stitches.
- Puff stitches.
- Front-post stitches.
- Alternating BLO rounds.
The selected visual source uses a highly textured cap based partly on puff stitches, but this tutorial intentionally uses a simpler ridge so beginners can concentrate on shaping and assembly first.
Turn the acorn into a keychain
Sew a small loop securely into the top of the cap.
Attach a keyring or swivel clasp.
For an item that will receive frequent handling, reinforce all attachment points carefully.
Create an autumn garland
Make five to nine acorns.
Crochet a long chain and attach each acorn by its stem.
Alternate with:
- Crochet leaves.
- Wooden beads.
- Mini pumpkins.
- Mushrooms.
Keep spacing consistent for a polished finish.
Gift ideas and use cases
Use finished acorns as:
- Gift toppers.
- Teacher gifts.
- Thanksgiving place decorations.
- Fall market products.
- Woodland nursery décor.
- Wreath accents.
- Bowl filler.
- Bookcase decoration.
For items intended as toys, pay particular attention to secure construction and avoid small detachable components for young children.
Finishing Instructions
Fastening off
Whenever the pattern instructs you to fasten off:
- Cut the yarn, leaving the required tail length.
- Pull the cut end completely through the active loop.
- Tighten gently.
Do not make an excessive hard knot that creates a visible bump.
Weaving in ends
Thread each tail onto a tapestry needle.
Pass beneath several stitches on the wrong side.
Change direction once.
Pass through several additional stitches.
Trim the yarn close to the fabric.
For the stuffed body, many tails can be hidden by passing the needle directly through the acorn and trimming close to the opposite surface.
The yarn end should disappear inside when the fabric relaxes.
Shaping
Hold the acorn between both hands.
Gently:
- Round the sides.
- Define the bottom point.
- Center the cap.
- Straighten or curve the stem.
Do not pull aggressively.
Small changes are usually enough.
Blocking
Traditional wet blocking is normally unnecessary for a small stuffed acorn.
The separate cap may be gently shaped by hand before attachment.
Avoid heavy heat unless you know exactly how your chosen fiber reacts.
Washing and care
Always check the care instructions for your specific yarn.
For a small stuffed decorative project, gentle spot cleaning is usually the least disruptive option.
If thoroughly washing:
- Use a method suitable for the yarn fiber.
- Avoid aggressive wringing.
- Reshape while damp.
- Allow the interior stuffing to dry completely.
Quick Printable-Style Summary
Project: Easy Crochet Acorn
Skill level: Beginner to Easy
Finished size: Approximately 4–4.5 inches tall
Yarn: Worsted-weight yarn in caramel and dark brown
Hook: 3.5 mm / E-4
Main stitches: Single crochet, slip stitch, increase, invisible decrease, BLO
Starting method: Magic ring
Body stitch counts
- R1: 5
- R2: 10
- R3: 15
- R4: 20
- R5: 25
- R6–10: 25
- R11: 20
- R12: 20
- R13: 15
- R14: 10
- R15: 5
Stuff before completing the final decrease rounds.
Cap stitch counts
- R1: 6
- R2: 12
- R3: 18
- R4: 24
- R5: 30
- R6 BLO: 30
- R7: 30
Leave a long sewing tail.
Stem
Ch 6.
Sl st in second chain from hook and each remaining chain.
Finishing
- Sew stem to center of cap.
- Position cap evenly.
- Sew cap to body.
- Weave in all ends.
- Shape gently.
FAQ
Is this crochet acorn pattern suitable for complete beginners?
It is best for a beginner who already knows how to make a chain and single crochet. The tutorial also introduces the magic ring, increases, invisible decreases, continuous rounds, stuffing, and simple sewing.
A complete beginner may need additional practice with the magic ring and counting rounds, but no advanced stitch pattern is required.
Can I start without a magic ring?
Yes.
As an alternative:
- Ch 2.
- Work the Round 1 stitches into the second chain from the hook.
The starting hole may be slightly more visible, but the method is perfectly usable.
What yarn is best for a crochet acorn?
Smooth cotton, acrylic, or a cotton-acrylic blend works well.
Cotton provides crisp stitch definition, while acrylic is often softer and available in a wide range of colors.
The most important requirement is creating fabric dense enough to contain the stuffing.
Why can I see stuffing through my stitches?
The likely causes are:
- Your hook is too large.
- Your tension is too loose.
- The acorn is overstuffed.
Try a hook 0.5 mm smaller and add filling gradually.
How do I make the acorn smaller?
Use thinner yarn and a smaller hook while maintaining sufficiently dense fabric.
Changing yarn weight is generally easier than recalculating every round.
Can I make the acorn without safety eyes?
Absolutely.
You can:
- Embroider eyes.
- Make French knots.
- Use short vertical black stitches.
- Omit the face entirely.
For a classic autumn-decoration look, a faceless acorn often works particularly well.
What can I make with several crochet acorns?
Use multiple finished acorns for:
- Garlands.
- Wreaths.
- Autumn centerpieces.
- Mantel décor.
- Gift toppers.
- Thanksgiving table decorations.
- Market products.
- Woodland displays.
Conclusion
This easy crochet acorn pattern is a useful first step into three-dimensional crochet because the construction is small enough to understand without becoming overwhelming.
The main body teaches the essential logic behind amigurumi shaping: begin with a small number of stitches, increase gradually to create width, work evenly to add height, decrease to narrow the shape, add stuffing at the right moment, and close the final opening neatly.
The separate cap then introduces a second useful skill—assembling crochet components with controlled sewing stitches.
For your first acorn, keep the colors traditional and concentrate on counting accurately. After completing one successful version, experiment with rust, mustard, sage, cream, terracotta, or other fall-inspired shades.
One acorn is a quick handmade decoration. Five can become a garland. A whole basket can become an autumn centerpiece.
The important part is to make the first one carefully, understand how the shape develops, and then use that knowledge to create your own coordinated collection.