Making your first crochet baby blanket can feel intimidating for one simple reason: it is bigger than the small practice squares, dishcloths, and coasters most beginners make when they first learn to crochet.
But a blanket does not need to be complicated.
This beginner-friendly crochet baby blanket uses a straightforward foundation row and one repeating texture built from groups of front post double crochet and back post double crochet stitches. Once you understand where to place the hook, the same six-row sequence repeats through almost the entire project.
The result is a thick, cozy rectangular blanket with a woven-looking texture that appears more complicated than it actually is.
This original version is designed as a confident beginner or beginner step-up project. You should already know how to make a chain and basic double crochet. The tutorial then walks you carefully through the two new skills: crocheting around the front of a stitch post and crocheting around the back of a stitch post.
You will not need complicated increases, decreases, motifs, seaming, colorwork, or joining dozens of separate pieces.
You will crochet one rectangle, repeat the texture until the blanket reaches the desired length, add a simple contrasting border, weave in the ends, and finish.
The selected visual reference article from Delia Creates follows a chunky cream basket-weave baby blanket through its foundation, post-stitch texture, border, and final presentation. This new article uses that visual sequence only as instructional inspiration; the stitch grouping, dimensions, materials, border, written instructions, image prompts, and educational structure below are original.
What You’ll Learn
By the end of this tutorial, you will know how to:
- Choose yarn for a beginner baby blanket.
- Make a relaxed foundation chain.
- Crochet a straight double-crochet base row.
- Identify the vertical post of a crochet stitch.
- Make a front post double crochet.
- Make a back post double crochet.
- Alternate raised and recessed stitch groups.
- Read a simple six-row texture repeat.
- Count stitches without losing the blanket edges.
- Recognize common tension problems.
- Keep the sides reasonably straight.
- Add a simple single-crochet border.
- Crochet clean corners.
- Fasten off securely.
- Weave in bulky-yarn ends.
- Lightly block and shape a finished blanket.
- Adjust the blanket’s width and length.
Materials You’ll Need
For one approximately 31 × 34 inch / 79 × 86 cm blanket:
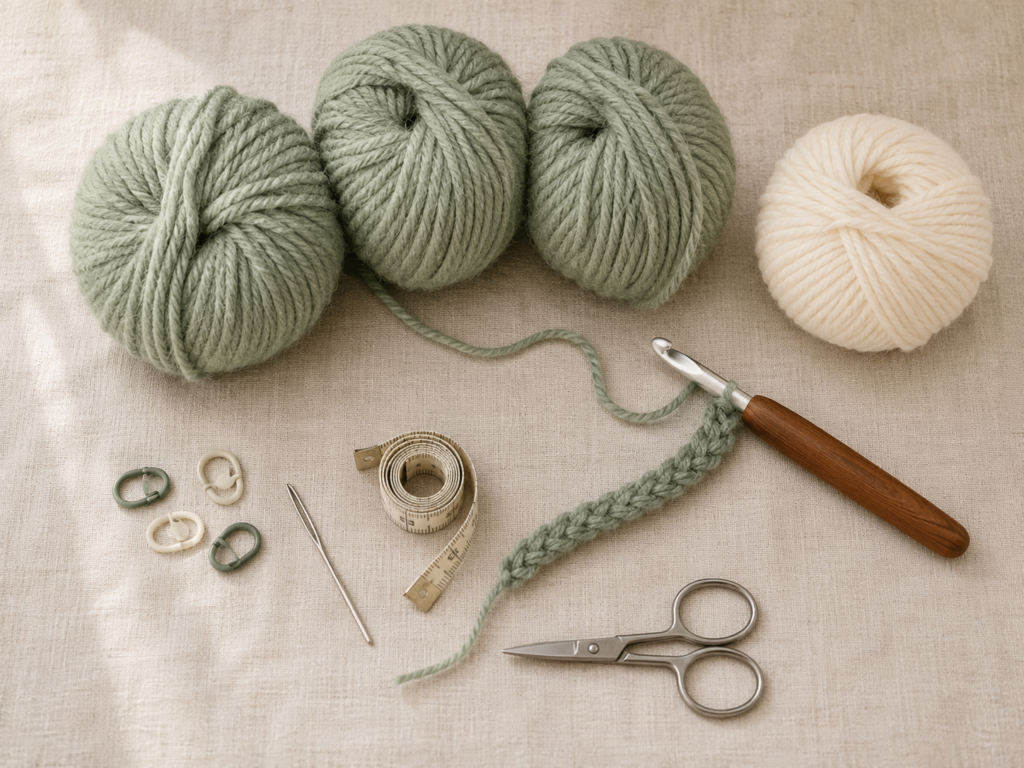
- Approximately 1,100–1,300 yards / 1,005–1,190 meters of bulky-weight yarn in the main color.
- Approximately 150–220 yards / 137–201 meters of bulky-weight yarn for the contrasting border.
- 8 mm / L-11 crochet hook.
- Blunt tapestry needle large enough for bulky yarn.
- Scissors.
- Measuring tape.
- Optional locking stitch markers.
- Optional blocking mats and rustproof pins.
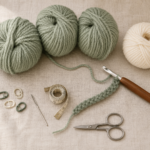
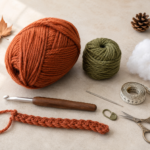
For the visual concept used throughout the new Midjourney prompts, the main blanket is muted sage green, with a warm cream border, an 8 mm silver hook with a walnut-colored ergonomic handle, a warm oatmeal linen background, and natural daylight from the left.
The Craft Yarn Council’s standardized system classifies bulky yarn as category 5, although the exact thickness, recommended hook, gauge, softness, and yardage can still vary significantly between yarn manufacturers and individual yarn lines. Always check the actual yarn label before purchasing.
Choosing yarn for a baby blanket
For a first blanket, prioritize:
- Softness against skin.
- Washability.
- Clear stitch definition.
- Yarn that does not split excessively.
- A color light enough that you can easily see the stitch posts.
Very dark yarn can make front-post and back-post placement harder to see, particularly when you are still learning.
A smooth acrylic or acrylic-blend bulky yarn is a practical beginner choice because it generally makes large stitches visible and allows the project to grow quickly.
Finished Size
The sample blanket is designed to finish at approximately:
31 inches wide × 34 inches long
79 cm wide × 86 cm long
Your actual size may differ because of:
- Yarn thickness.
- Crochet hook.
- Individual tension.
- Number of texture repeats.
- Number of border rounds.
That is completely normal.
For a blanket, exact gauge is less critical than it would be for a fitted garment, but making a small swatch is still useful because it lets you confirm that the fabric feels soft rather than stiff.
Gauge and Tension
Approximate sample gauge:
8 double crochet stitches = 4 inches / 10 cm
6 basket-texture rows = approximately 4 inches / 10 cm
Do not force your hands to match this gauge unnaturally.
Instead, make a swatch first.
Simple practice swatch
Ch 20.
Work one double crochet row.
Practice groups of three front post double crochet and three back post double crochet stitches across.
Continue for at least seven rows.
Ask yourself:
- Can I insert the hook around the posts comfortably?
- Does the fabric lie reasonably flat?
- Is it soft enough for a blanket?
- Can I clearly distinguish the raised and recessed groups?
If the fabric is extremely stiff, move up to a larger hook.
If it has very large gaps and little structure, try a smaller hook.
Crochet Abbreviations Used
This pattern uses U.S. crochet terminology:
- ch = chain
- sc = single crochet
- dc = double crochet
- fpdc = front post double crochet
- bpdc = back post double crochet
- sl st = slip stitch
- st/sts = stitch/stitches
- rep = repeat
- RS = right side
- WS = wrong side
The Craft Yarn Council publishes standardized crochet abbreviations to help make patterns more consistent across publications and designers.
U.S./U.K. terminology note
This tutorial uses U.S. terms.
A U.S. double crochet is called a treble crochet in standard U.K. terminology, so do not follow U.K. stitch instructions without translating the terminology first.
Before You Start
Understand the stitch multiple
The textured section is built in groups of six stitches:
- 3 front post double crochets.
- 3 back post double crochets.
For this baby blanket, you will have:
60 working stitches.
That gives you ten complete groups of six.
The turning chain does not count as a stitch
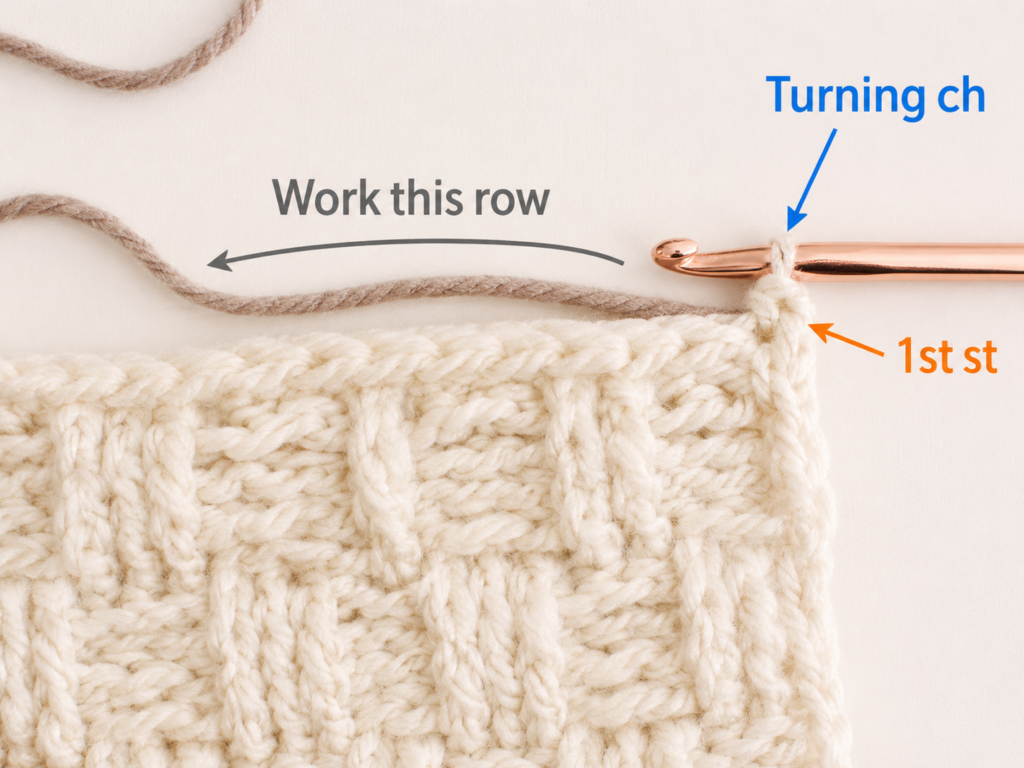
In this original pattern, the beginning ch 2 does not count as a stitch.
That means you always work into the first real stitch of the row.
This rule is important because accidentally treating the turning chain as a stitch in some rows but not others is one of the fastest ways to make the blanket gradually become narrower or wider.
Use stitch markers at the edges
A simple beginner trick is to put a locking stitch marker in:
- The first real stitch.
- The last real stitch.
Move the markers upward as you complete each row.
How to identify a stitch post
Look at an ordinary double crochet.
You can see:
- A V-shaped top.
- A vertical body beneath it.
That vertical body is the post.
For regular double crochet, you usually work through the loops at the top.
For post stitches, you work around the body of the stitch.
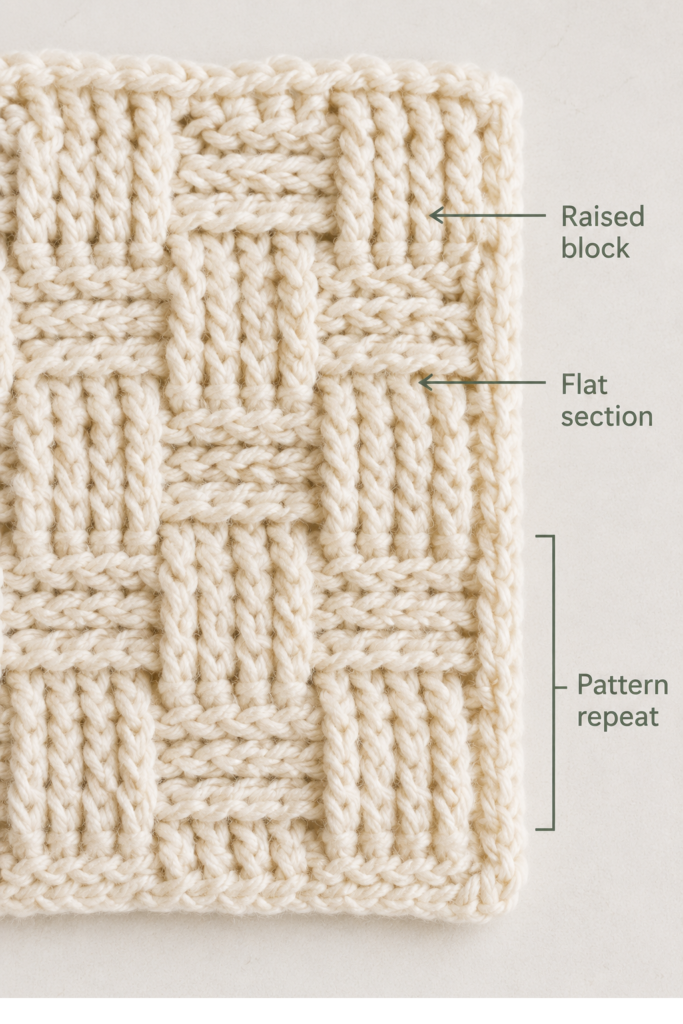
How the texture works
A front post double crochet pushes the post toward the front of the fabric.
A back post double crochet pushes it toward the back.
When several are grouped together, one section appears raised while the neighboring section recedes.
After several rows, reversing those groups produces the basket-like texture.
Step-by-Step Crochet Tutorial
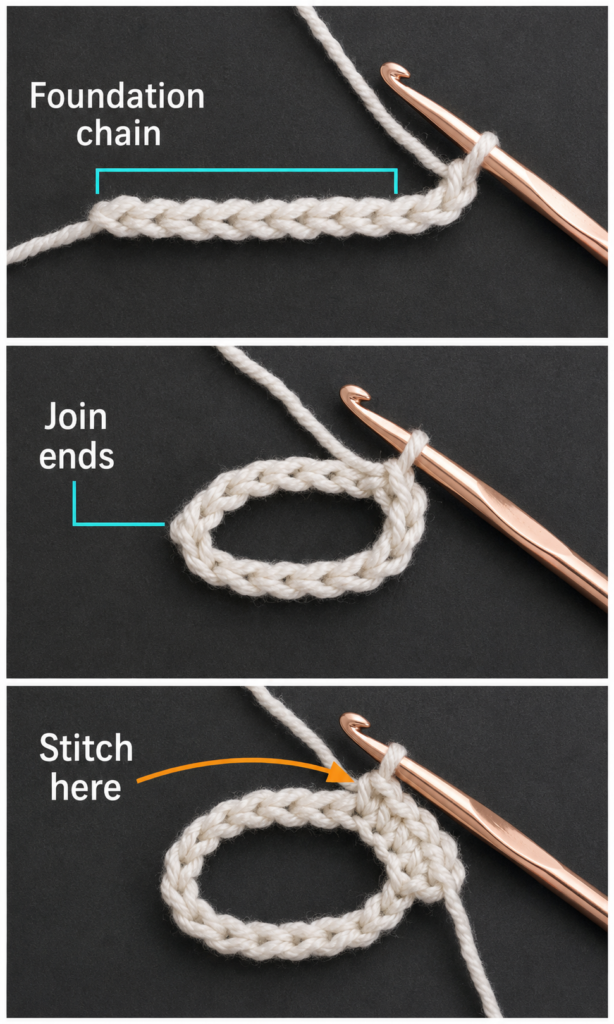
Step 1: Make the Foundation Chain
With the main sage-green yarn:
Ch 62.
Try to keep the chain relaxed.
Do not pull each chain tightly against the narrow throat of the hook.
Let the loops sit comfortably around the wider shaft of the 8 mm hook before forming the next chain.
Your chain should:
- Curve naturally.
- Remain easy to work into.
- Not twist tightly into a corkscrew.
- Measure approximately the desired blanket width once the first row is complete.
Beginner tip:
Stop every 10 chains and count.
You can also place a locking stitch marker in chains 20, 40, and 60 so you do not have to restart the count from the beginning if interrupted.
Common mistake to avoid:
Counting the loop currently on the hook as a chain.
The active loop on your hook is never included in the foundation-chain count.
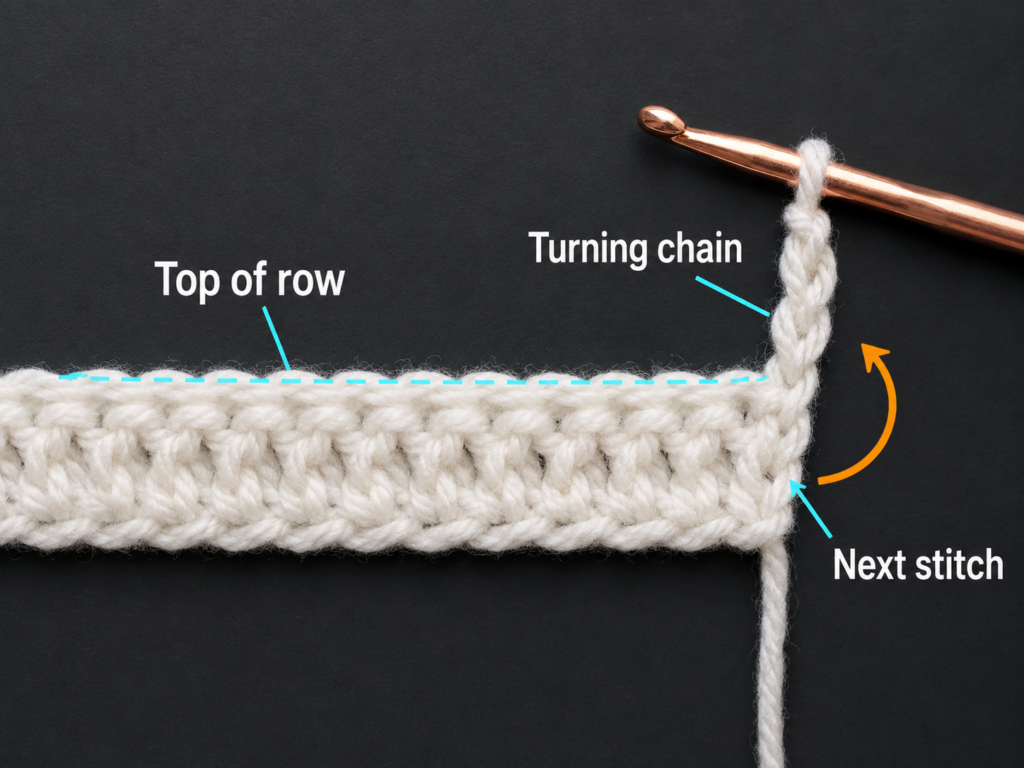
Step 2: Crochet the Base Row
Turn the foundation chain so the V shapes are easy to see.
Work:
Row 1: Dc in the 3rd ch from the hook and in every remaining chain across. Ch 2, turn.
Stitch count: 60 dc
Remember: the ch 2 does not count as a stitch.
How to make a double crochet
- Yarn over.
- Insert hook into the appropriate chain.
- Yarn over.
- Pull up a loop.
You now have three loops on the hook.
- Yarn over.
- Pull through two loops.
- Yarn over again.
- Pull through the final two loops.
One double crochet is complete.
Repeat across the entire chain.
Beginner tip:
Count all 60 stitches before continuing.
This base row determines whether your entire basket repeat will align correctly.
Common mistake to avoid:
Missing the final chain.
The last chain can become tight and tilt sideways. Mark it before beginning Row 1 when necessary.
Step 3: Learn the Front Post Double Crochet
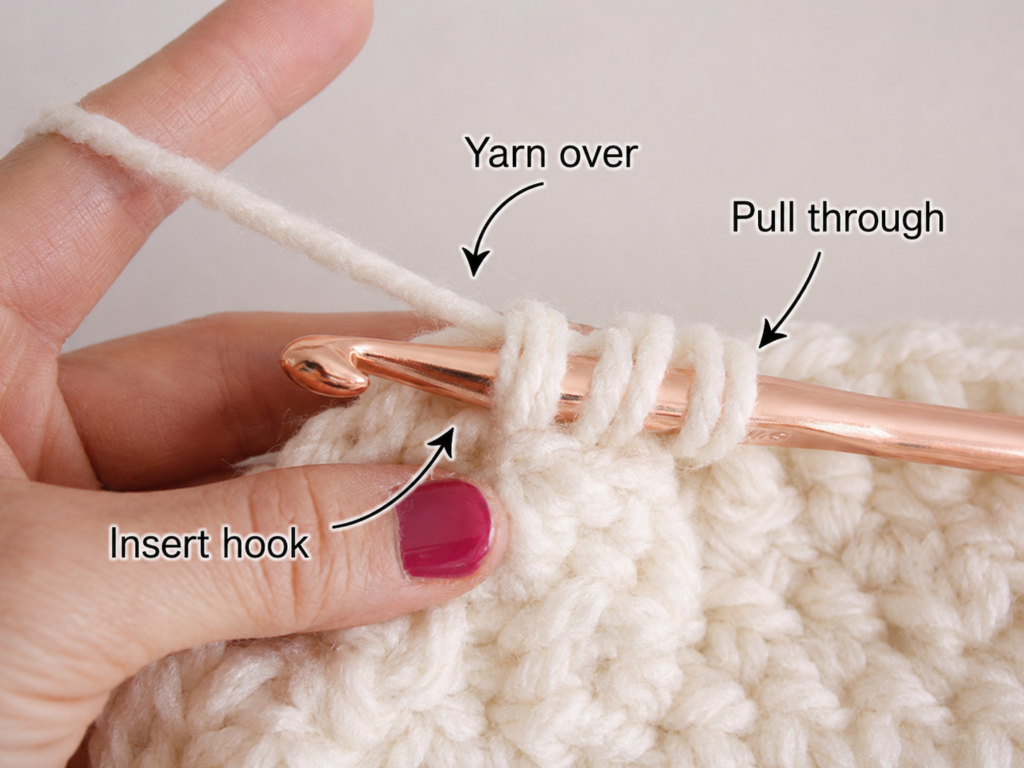
Before beginning Row 2, identify the vertical post of the first double crochet.
For a front post double crochet:
- Yarn over.
- Insert your hook from front to back in the space immediately before the next stitch post.
- Bring the hook around the back of that post.
- Push the hook back toward the front through the space immediately after the same post.
The vertical stitch post should now lie in front of your hook.
- Yarn over.
- Pull up a loop around the post.
You now have three loops on the hook.
- Yarn over and pull through two.
- Yarn over and pull through the remaining two.
The completed stitch should appear raised toward you.
Beginner tip:
Do not push the hook through the actual yarn strands of the stitch.
You are working around the entire vertical post.
Common mistake to avoid:
Inserting through the top V as though making a normal double crochet.
Pause and confirm that the hook passes horizontally around the body of the stitch.
Step 4: Learn the Back Post Double Crochet and Complete the First Texture Group
A back post double crochet uses the same double-crochet motion, but the hook travels in the opposite direction.
For a bpdc:
- Yarn over.
- Move the hook behind the fabric.
- Insert from back to front immediately before the next stitch post.
- Pass horizontally in front of the post.
- Push the hook back through to the rear immediately after that post.
The post is now positioned behind the hook.
- Yarn over.
- Pull up a loop.
- Yarn over and pull through two.
- Yarn over and pull through the last two loops.
Now begin the texture:
Row 2
Ch 2 and turn.
Work:
*Fpdc around each of the next 3 sts, bpdc around each of the next 3 sts; repeat from * across. Ch 2, turn.
Stitch count: 60
Row 3
Repeat Row 2.
Row 4
Repeat Row 2 once more.
You have now completed three rows with the same raised-and-recessed orientation.
The texture should begin to show vertical rectangular sections.
Beginner tip:
Say the pattern aloud while working:
Front three. Back three. Front three. Back three.
This simple rhythm can prevent losing your position.
Common mistake to avoid:
Switching after two stitches or four stitches.
Every group contains exactly three post stitches.
At the end of each row, you should have 10 total groups.
Step 5: Reverse the Texture and Continue the Blanket
Now you will reverse the stitch groups.
The sections that previously projected forward will recede, and the recessed groups will come forward.
Row 5
Ch 2 and turn.
Work:
*Bpdc around each of the next 3 sts, fpdc around each of the next 3 sts; repeat from * across. Ch 2, turn.
Row 6
Repeat Row 5.
Row 7
Repeat Row 5 once more.
You have now completed one full six-row texture repeat:
- Rows 2–4: front 3, back 3.
- Rows 5–7: back 3, front 3.
Continue the body
Repeat Rows 2–7 until you have completed 49 total rows, including the original foundation double-crochet row.
Or stop when the body measures approximately 32½–33 inches long before adding the border.
The exact length is customizable.
How to check your work
Every few rows, lay the blanket flat.
Check:
- Do you still have 60 stitches?
- Are there ten groups across?
- Are the first and last edges reasonably straight?
- Does the texture reverse every three rows?
- Is the fabric lying flat rather than becoming extremely wavy?
Beginner tip:
Use a row counter, notebook, or simple tally marks.
For example:
||| / |||
The first three marks represent one texture direction; the next three represent the reversed direction.
Common mistake to avoid:
Reversing the pattern after the wrong number of rows.
A four-row block next to a three-row block will be visible in the final fabric.
Count carefully before switching.
Step 6: Add the Simple Cream Border
Once the main body reaches the desired length, complete the final row and fasten off the sage yarn.
Weave in the main-color tail enough that it does not interfere with the border.
Join the warm cream border yarn in any corner.
Border Round 1
Ch 1.
Work single crochet evenly around the entire blanket.
Along the top and bottom:
Work 1 sc in each stitch.
At each corner:
Work 3 sc into the corner space.
Along each side edge:
Work single crochets evenly into the row ends.
There is no universal stitch count for the side edges because individual row height and tension vary.
The important goal is a flat border.
Watch the fabric:
- If it ripples strongly, you probably have too many stitches.
- If it cups inward or pulls tightly, you probably have too few.
Join with a sl st to the first sc.
Border Round 2
Ch 1.
Sc in each stitch around.
At every corner, work:
3 sc into the center corner stitch from the previous round.
Join with a sl st to the first sc.
Fasten off.
Beginner tip:
Before completing the entire first border round, work one full side and one corner.
Lay that section flat.
The blanket itself will tell you whether your spacing is working.
Common mistake to avoid:
Adding too many stitches along the sides simply because gaps appear between row ends.
A small amount of open space is preferable to a badly ruffled border.
Pattern Notes or Stitch Notes
Turning-chain rule
The ch 2 at the beginning of every body row does not count as a stitch.
Do not crochet around it as though it were another post.
Stitch count
Maintain:
60 stitches across every body row.
The textured pattern depends on complete groups of six.
Pattern repeat
The complete texture repeat is:
Rows 2–4:
*3 fpdc, 3 bpdc; repeat across.
Rows 5–7:
*3 bpdc, 3 fpdc; repeat across.
Repeat those six rows.
Right side and wrong side
This texture is attractive on both surfaces, but the two sides are not perfectly identical.
Choose the side you prefer as the right side before photographing, gifting, or displaying the blanket.
Adjusting the width
The body requires a working stitch count divisible by 6.
This pattern starts with 60 working stitches.
Because Row 1 begins in the third chain from the hook, add two chains to the desired working stitch count.
Examples:
- 42 working stitches: ch 44.
- 48 working stitches: ch 50.
- 54 working stitches: ch 56.
- 60 working stitches: ch 62.
- 66 working stitches: ch 68.
- 72 working stitches: ch 74.
Make a gauge swatch before assuming a specific chain count will produce an exact measurement.
Adjusting the length
Length is much easier.
Simply repeat the six-row texture sequence until the blanket reaches your desired measurement.
For the most balanced basket effect, stop after completing a full three-row block whenever possible.
Common Beginner Mistakes
1. The blanket keeps getting narrower
Likely cause: You are missing the first or last stitch.
Fix: Mark both edge stitches with locking stitch markers.
Count 60 stitches regularly.
2. The blanket keeps getting wider
Likely cause: You are accidentally working around the turning chain as though it were another post.
Fix: Remember that the ch 2 does not count as a stitch in this pattern.
3. The basket blocks do not line up
Likely cause: One group contains two or four stitches instead of three.
Fix: Count each group aloud:
1, 2, 3 — switch.
There should always be 10 groups across.
4. The pattern has one block that is taller than the others
Likely cause: You reversed the front/back sequence after two or four rows rather than three.
Fix: Use a row counter and switch direction only after three consecutive rows.
5. The fabric is extremely stiff
Likely cause: Tight tension or a hook that is too small for your yarn and personal technique.
Fix: Try a larger hook and remake a small swatch.
The goal is a cozy fabric with enough flexibility to drape.
6. The foundation edge pulls inward
Likely cause: The starting chain is too tight.
Fix: Remake the chain loosely or make the foundation chain with a hook one size larger, then return to the main hook for Row 1.
7. The border ruffles
Likely cause: Too many stitches were placed along the side edges.
Fix: Undo the affected section and use fewer stitches.
Lay the work flat frequently while edging.
8. The border pulls the blanket inward
Likely cause: Too few side stitches.
Fix: Add slightly more stitches along that side without overcrowding the fabric.
9. I cannot tell front post from back post stitches
Stop and look at the hook path rather than the finished stitch.
For fpdc, the hook travels around the post from the front.
For bpdc, you begin from behind and push the post away from you.
Work slowly until the movement becomes familiar.
How to Customize This Crochet Project
Change the yarn
You do not have to use bulky yarn.
You could use:
- Worsted-weight acrylic.
- Soft cotton blend.
- Washable wool blend, where appropriate.
- Baby-specific acrylic yarn.
- Recycled synthetic yarn with suitable softness.
However, changing yarn weight changes:
- Starting dimensions.
- Hook size.
- Yardage.
- Number of rows.
- Overall weight.
- Drape.
Make a swatch before committing to the full blanket.
Change the colors
The generated tutorial palette uses sage green with a warm cream border, but many combinations work beautifully.
Try:
- Oatmeal + terracotta.
- Dusty blue + ivory.
- Pale peach + cream.
- Mustard + oatmeal.
- Lavender + warm white.
- Forest green + camel.
- One solid neutral color.
- Tonal shades of the same color family.
For a calm nursery look, limit the project to one main shade and one border shade.
Make wider basket blocks
This original tutorial uses groups of three.
After becoming comfortable with post stitches, you can design variations using:
- Groups of four.
- Groups of five.
- Narrow two-stitch blocks.
Keep the total stitch count compatible with the chosen repeat.
Add a deeper border
Instead of two single-crochet rounds, add:
- Three or four sc rounds.
- One hdc round after the sc foundation.
- A final reverse-single-crochet edge.
- A subtle contrasting stripe.
For a first baby blanket, a simple border is often easier to keep flat.
Make a stroller blanket
Use fewer working stitches and stop at a shorter length.
Always measure the actual project rather than relying entirely on a generic size chart.
Make a larger toddler blanket
Increase the width in multiples of six stitches and crochet additional length repeats.
Remember that a larger blanket requires substantially more yarn.
Turn it into a monochrome heirloom-style blanket
Use one cream, oatmeal, or pale-gray yarn for both body and border.
The post stitches create enough shadow and texture that the blanket does not need contrasting colors to look interesting.
Gift ideas and uses
This project can make a thoughtful:
- Baby-shower gift.
- Newborn welcome gift.
- Handmade family keepsake.
- Stroller blanket.
- Supervised tummy-time mat.
- Nursery photo prop while an adult is present.
Important infant safe-sleep note
A handmade baby blanket should not be placed as loose bedding in an infant’s sleep space. The American Academy of Pediatrics recommends keeping blankets and other loose bedding out of a baby’s sleep area and using a firm, flat sleep surface with only a fitted sheet.
Finishing Instructions
Fastening off
After completing Border Round 2:
- Slip stitch to the first sc.
- Cut the yarn, leaving approximately an 8-inch tail.
- Pull the tail completely through the active loop.
- Tighten gently.
Do not cut the tail close to the knot.
Weaving in ends
Thread one yarn tail onto a blunt tapestry needle.
On the wrong side:
- Pass beneath several sturdy stitches.
- Change direction.
- Pass through several more stitches.
- Avoid pulling so tightly that the fabric gathers.
- Trim only after the tail feels secure.
Bulky yarn may require a larger-eye tapestry needle.
Do not try to force a thick yarn through a tiny needle eye because this can fray or split the strand.
Shaping the blanket
Lay the finished blanket flat.
Gently straighten:
- Top edge.
- Bottom edge.
- Both sides.
- Four corners.
Do not stretch the texture aggressively.
The goal is simply to help the blanket settle into its natural rectangular shape.
Blocking
Whether blocking is appropriate depends on the fiber.
Always check the actual yarn label first.
For acrylic, excessive direct heat can permanently alter the fibers.
For wool or natural-fiber blends, wet blocking may be more suitable.
When uncertain, test the chosen blocking method on a swatch first.
Washing and care
Follow the care instructions for the exact yarn you used.
Before gifting:
- Secure every yarn end.
- Inspect the border.
- Look for loose loops or damaged stitches.
- Wash only according to the yarn manufacturer’s instructions.
- Dry completely before storage or gifting.
Quick Printable-Style Summary
Project: Beginner Textured Crochet Baby Blanket
Skill level: Confident Beginner / Beginner Step-Up
Finished size: Approximately 31 × 34 inches / 79 × 86 cm
Main yarn: Bulky-weight category 5 yarn
Border yarn: Contrasting bulky-weight yarn
Hook: 8 mm / L-11
Main stitches: Ch, dc, fpdc, bpdc, sc, sl st
Starting method
With main color:
Ch 62.
Row 1
Dc in 3rd ch from hook and every chain across.
60 dc
Ch 2, turn.
Rows 2–4
*Fpdc in next 3 sts, bpdc in next 3 sts; repeat from * across.
Ch 2, turn.
Rows 5–7
*Bpdc in next 3 sts, fpdc in next 3 sts; repeat from * across.
Ch 2, turn.
Repeat
Repeat Rows 2–7 until approximately 49 total rows have been completed or the blanket reaches your preferred length.
Border Round 1
Join contrasting yarn.
Sc evenly around.
Work 3 sc into every corner.
Join.
Border Round 2
Sc in each stitch around.
Work 3 sc into the center corner stitch at each corner.
Join and fasten off.
Finishing
Weave in all ends.
Gently shape.
Block only in a way appropriate for the chosen yarn fiber.
FAQ
Is this a good crochet baby blanket pattern for complete beginners?
It is best for a beginner who already knows how to chain and make a basic double crochet.
The two new techniques—front post double crochet and back post double crochet—may feel awkward during the first practice rows, but the project becomes repetitive after you learn the hook placement.
For someone who has never held a crochet hook before, practice chains and ordinary double crochet on a small swatch first.
What is the easiest crochet stitch for a baby blanket?
There is no single universally easiest choice because difficulty depends on the crocheter.
Single crochet is structurally simple but short, so a large blanket can take many rows.
Double crochet grows more quickly.
This project uses post double crochet stitches to add texture without requiring complex shaping or multiple pieces.
Why does my basket-weave pattern look different on the back?
Front-post and back-post stitches deliberately push crochet posts toward opposite sides of the fabric.
The two surfaces therefore have related but reversed textures.
That is normal.
Choose whichever side you prefer as the right side.
Can I use worsted-weight yarn instead of bulky yarn?
Yes, but the finished blanket will be smaller when using the same stitch count.
To maintain approximately the same dimensions, you would need:
- More starting stitches.
- More rows.
- A hook appropriate for the new yarn.
- Additional yardage.
Make a gauge swatch before calculating the new starting chain.
How do I make the blanket wider?
Increase the number of working stitches in multiples of six.
Because this pattern begins in the third chain from the hook, add two extra chains to your desired working stitch count.
For example:
- 60 working sts = ch 62.
- 66 working sts = ch 68.
- 72 working sts = ch 74.
Why are my edges uneven?
The most common cause is losing or adding stitches.
Use locking stitch markers in the first and last working stitches of every row.
Count regularly and remember that the ch 2 does not count as a stitch in this original pattern.
Can I skip the border?
Yes.
The blanket can be finished after the main texture section.
However, a simple border can help visually frame the texture and give the project a more finished appearance.
Conclusion
A first crochet baby blanket does not have to rely on dozens of different stitches or complicated construction.
This project begins with one foundation chain, one ordinary double-crochet row, and one repeating texture based on groups of three front-post and back-post double crochet stitches.
The most challenging moment is usually the first encounter with post stitches.
At first, finding the vertical post and guiding a large hook around it can feel slow. After several rows, the movement becomes far more natural, and the pattern settles into a predictable rhythm:
Three forward. Three back. Repeat.
Then reverse the orientation after three rows.
That repetition is what transforms an ordinary rectangle into a deeply textured blanket.
Take time to count the foundation row carefully. Mark the first and last stitches. Check every few rows that you still have 60 stitches. Do not rush the border. Let the fabric guide your side-edge spacing so the finished blanket remains flat.
The result is a practical beginner step-up project with enough texture to feel special without requiring complicated assembly.