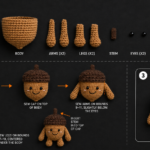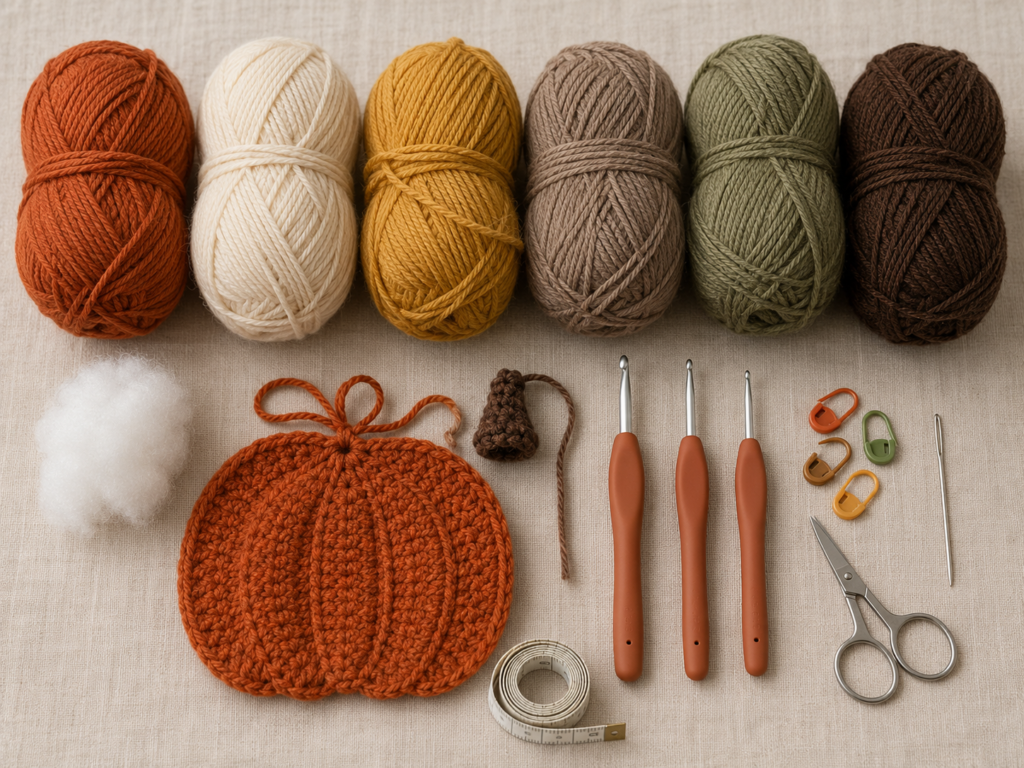
There is something especially satisfying about fall crochet projects that can come out of storage year after year. A handmade pumpkin garland does not wilt, need watering, or disappear when autumn ends. Make it once, pack it away carefully, and it can return every September to decorate a mantel, bookshelf, entryway, classroom, window, or Thanksgiving table.
This easy crochet pumpkin garland pattern is designed as a complete beginner-friendly project rather than a collection of unrelated motifs.
You will begin by crocheting two matching flat panels for each pumpkin. A final shaping round transforms a simple circle into a more recognizable pumpkin silhouette. The two panels are then joined, lightly stuffed, and finished with a separate brown stem and small sage-green curly vine.
After making five pumpkins, you will crochet one long cream cord with hanging loops and attach the pumpkins at evenly measured intervals.
The finished result has a little dimension without becoming a full amigurumi project. There are no complicated invisible decreases, embroidered faces, safety eyes, or advanced sewing techniques.
You will practice several fundamental crochet skills in one practical project:
- Magic ring construction.
- Joined rounds.
- Half double crochet.
- Double crochet.
- Increases.
- Changing stitch heights to create shaping.
- Making two matching panels.
- Joining panels with single crochet.
- Light stuffing.
- Sewing small components securely.
- Repeating motifs consistently.
- Making an adjustable garland cord.
The Craft Yarn Council describes basic projects as those using fundamental stitches and potentially basic increases and decreases, while easy projects may also incorporate simple shaping. This pumpkin garland sits around that beginner-to-easy boundary because its main body uses familiar stitches with one dedicated shaping round and straightforward assembly.
What You’ll Learn
By the end of this tutorial, you will know how to:
- Form and close a magic ring.
- Crochet a small circle in joined rounds.
- Increase evenly without creating random extra stitches.
- Recognize the first real stitch after a turning chain.
- Use slip stitch, single crochet, half double crochet, and double crochet strategically for shaping.
- Make two reasonably matching pumpkin panels.
- Crochet a small tapered stem.
- Create a naturally curling crochet vine.
- Align two motifs with their wrong sides facing inward.
- Join crochet panels around the perimeter.
- Avoid overstuffing a flat decorative motif.
- Sew a stem and vine into the top seam.
- Make five consistent pumpkins in coordinated fall colors.
- Crochet a long garland cord with loops at both ends.
- Space repeated motifs evenly.
- Block and store reusable crochet decor.
Materials You’ll Need
For one five-pumpkin garland approximately 52–60 inches long, gather the following.
Yarn
Use medium-weight yarn in:
- Muted burnt orange.
- Warm oatmeal cream.
- Dusty mustard.
- Mushroom taupe.
- Deep bark brown for stems.
- Sage green for curly vines.
- Warm cream for the garland cord.
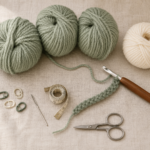
Cotton, acrylic, or a cotton-acrylic blend can all work. A relatively smooth yarn is easiest for beginners because individual stitches remain visible.
The Craft Yarn Council’s Standard Yarn Weight System classifies yarn according to standardized weight categories, but it also emphasizes that recommended hook sizes and gauges are guidelines rather than guarantees. Two yarns within the same broad weight category can still behave differently.
Hooks
- 4.5 mm crochet hook for pumpkin panels.
- 3.5 mm crochet hook for stems and curly vines.
- 4.0 mm crochet hook for joining panels and making the garland cord.
Metric millimeter sizing is the most precise way to identify hook diameter because U.S. letter and number designations can vary between manufacturers.
Other supplies
- Small amount of polyester stuffing.
- Locking stitch marker.
- Blunt tapestry needle.
- Small embroidery scissors.
- Measuring tape.
- Optional rustproof pins.
- Optional blocking mat.
Approximate yarn quantities
For five pumpkins and one cord, approximately:
- 35–45 yards of each main pumpkin color, depending on how many pumpkins you make in each shade.
- 10–15 yards total of brown.
- 15–20 yards total of sage green.
- 30–45 yards for the cream garland cord.
Exact yarn usage varies with tension, yarn thickness, hook choice, motif size, and how densely you stuff.
Finished Size
Using medium-weight yarn and the hook sizes specified above:
Individual pumpkin: Approximately 4–4.5 inches / 10–11.5 cm wide and 3.5–4 inches / 9–10 cm tall, excluding the longest part of the vine.
Complete garland: Approximately 52–60 inches / 132–152 cm, adjustable.
Because this is a decorative project, exact gauge is not critical. Consistency between your five pumpkins matters more than matching one precise measurement.
Gauge and Tension Note
A useful target after Round 3 is a flat circle measuring approximately 3–3.5 inches across.
Do not force yourself to match that number exactly. Instead, focus on making every pumpkin panel with:
- The same yarn weight.
- The same hook.
- Similar tension.
- The correct stitch count.
After making your first finished pumpkin, use it as the master sample for the other four.
Place each new panel over the first panel before assembly. If the edges approximately match, your tension is consistent enough.
Crochet Abbreviations Used
This tutorial uses U.S. crochet terminology:
- ch = chain
- sl st = slip stitch
- sc = single crochet
- hdc = half double crochet
- dc = double crochet
- st/sts = stitch/stitches
- inc = increase
- rep = repeat
- rnd = round
- RS = right side
- WS = wrong side
These abbreviations follow the Craft Yarn Council’s standardized crochet terminology.
U.S./U.K. terminology note
This pattern is written in U.S. terms.
Be careful when following a U.K. stitch guide because:
- U.S. single crochet = U.K. double crochet.
- U.S. half double crochet = U.K. half treble.
- U.S. double crochet = U.K. treble.
The terminology differences are documented in the Craft Yarn Council’s crochet abbreviation guide.
Before You Start
How many pieces do you need?
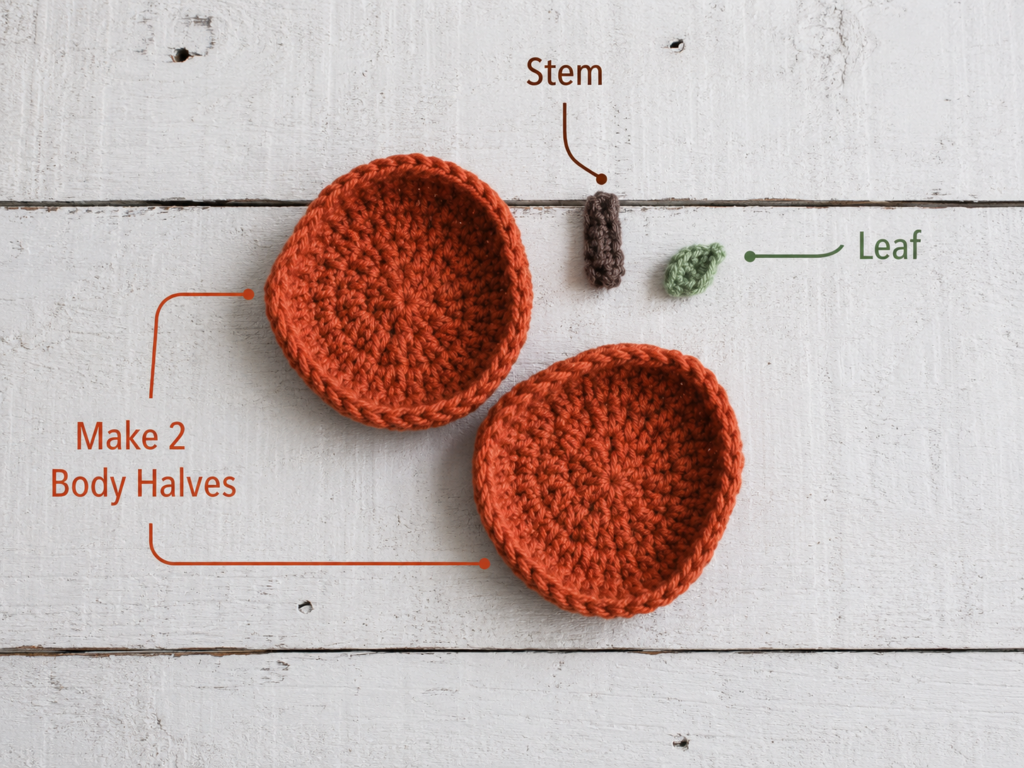
For one pumpkin, make:
- Two matching pumpkin body panels.
- One brown stem.
- One green curly vine.
For the complete sample garland, make five pumpkins.
That means you will eventually crochet:
- 10 pumpkin panels.
- 5 stems.
- 5 vines.
Making ten panels may sound repetitive, but each panel contains only four rounds.
How to count stitches
The beginning chain does not count as a stitch in this original pattern.
At the end of each round, join with a slip stitch to the first actual stitch.
Your key stitch counts are:
- Round 1: 10 hdc.
- Round 2: 20 hdc.
- Round 3: 30 hdc.
- Round 4: 38 total stitches, including the slip stitches used for shaping.
How to keep the circle flat
If the center becomes strongly bowl-shaped:
- Confirm you did not miss an increase.
- Relax your tension.
- Consider moving to a 5.0 mm hook if you naturally crochet very tightly.
If the panel becomes extremely wavy:
- Check for accidental increases.
- Confirm your count before starting the next round.
A tiny amount of movement is not a problem. The panel will later be joined and lightly stuffed.
How to choose colors
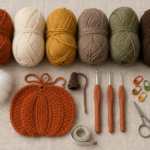
For a rustic five-pumpkin sequence, try:
- Burnt orange.
- Oatmeal cream.
- Dusty mustard.
- Mushroom taupe.
- Burnt orange.
For a modern neutral version:
- Cream.
- Taupe.
- Cream.
- Sage.
- Taupe.
For a more colorful autumn look:
- Rust.
- Mustard.
- Brick red.
- Olive.
- Cream.
Keep the stems and vines consistent to visually unite the garland.
Step-by-Step Crochet Tutorial
Step 1: Make the Magic Ring and Crochet Round 1
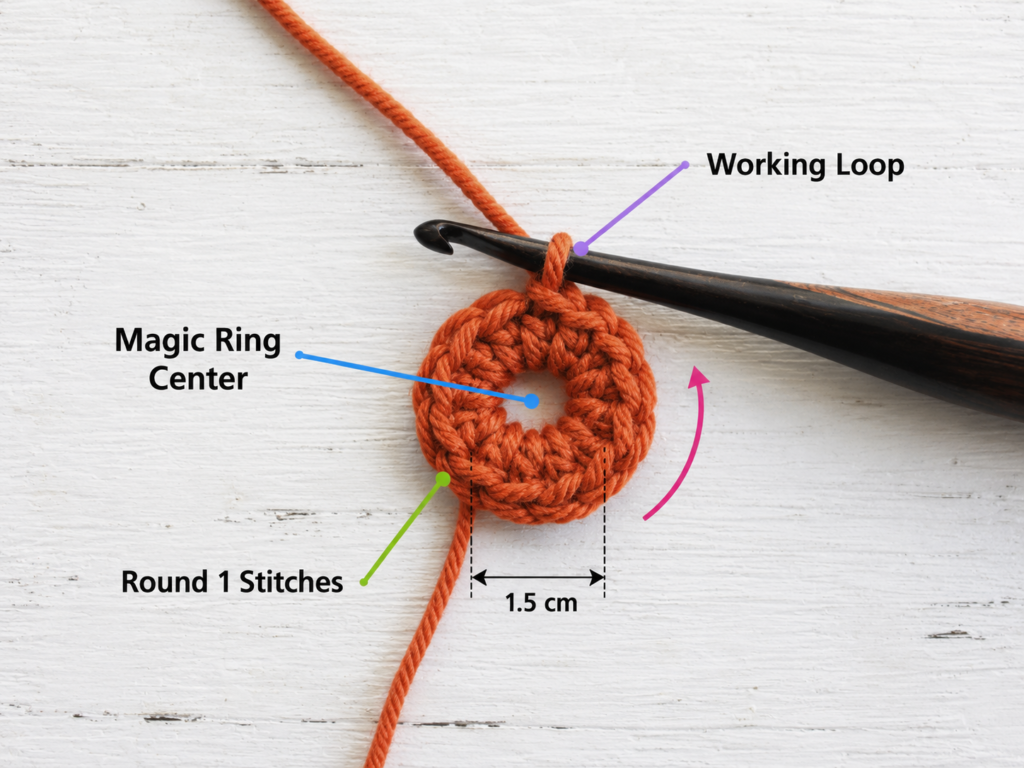
Using your 4.5 mm hook and first pumpkin color, make a magic ring.
Ch 1. The chain does not count as a stitch.
Work:
10 hdc into the magic ring.
Gently pull the starting tail to close the center.
Join with a sl st to the first hdc.
Stitch count: 10 hdc
Do not confuse the beginning ch 1 with your first stitch.
Beginner tip:
Count your stitches before pulling the ring completely closed. Ten clear stitch tops are easier to identify while the center remains slightly open.
Common mistake to avoid:
Joining into the beginning chain instead of the first hdc.
The chain is only for height. Place your slip-stitch join in the first actual half double crochet.
Step 2: Increase to 20 Stitches
Ch 1.
Work:
2 hdc in each stitch around.
Join with a sl st to the first hdc.
Stitch count: 20 hdc
You have doubled the stitch count by placing two stitches into every stitch from the previous round.
The piece should begin looking like a small, flat circle.
Beginner tip:
Think in groups of two.
As you move around the round, count:
2, 4, 6, 8, 10...
This is often easier than counting every individual stitch from one to twenty.
Common mistake to avoid:
Accidentally putting only one hdc into a stitch.
Check for ten visible increase groups before joining.
Step 3: Increase to 30 Stitches
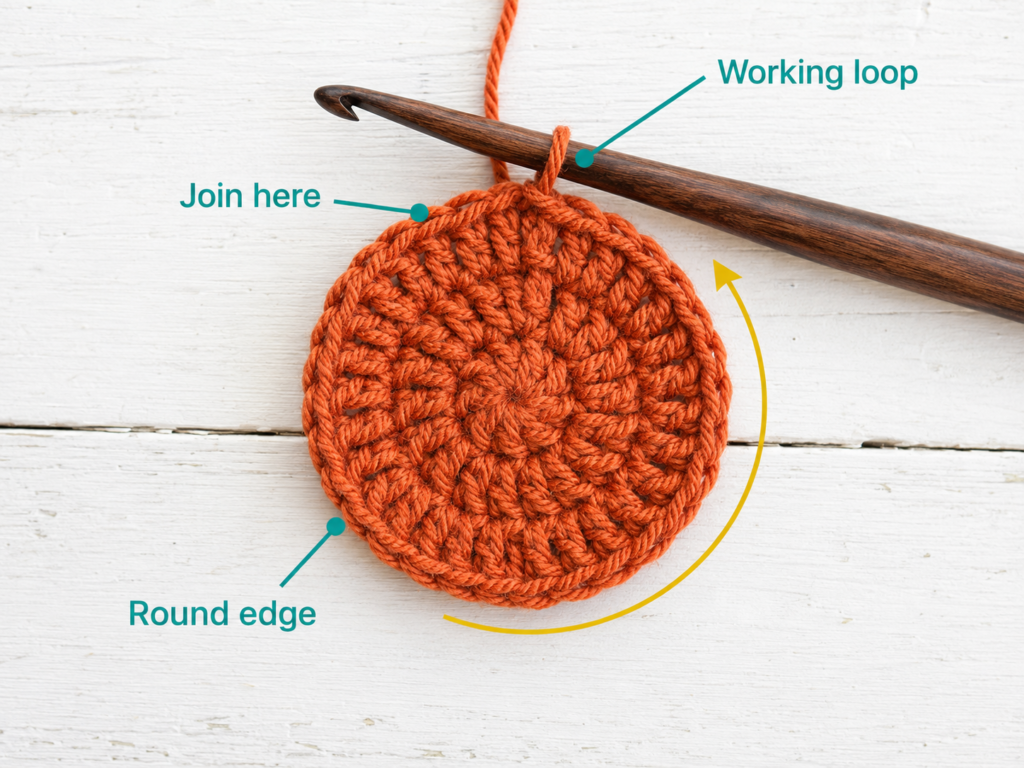
Ch 1.
Repeat the following around:
*1 hdc in the next stitch, 2 hdc in the next stitch; rep from * around.
Join with a sl st to the first hdc.
Stitch count: 30 hdc
You should have ten repeats.
At this stage, the piece is still a circle. The next round will turn it into a pumpkin shape.
Beginner tip:
Place a stitch marker after every complete repeat when learning:
- One hdc.
- One increase.
Each repeat produces three stitches.
Ten repeats create thirty stitches.
Common mistake to avoid:
Starting the next increase too early.
The repeat is always one normal hdc followed by two hdc worked together into the next stitch.
Step 4: Shape the Pumpkin Silhouette
Do not chain.
Round 4 uses all 30 stitches from Round 3.
Work the following sequence carefully:
First half:
- Sl st in next st.
- Sc in next st.
- Hdc in next st.
- Dc in next st.
- 2 dc in next st.
- 2 dc in next st.
- Dc in next st.
- Dc in next st.
- 2 dc in next st.
- 2 dc in next st.
- Dc in next st.
- Hdc in next st.
- Sc in next st.
- Sl st in next st.
- Sl st in next st.
Second half:
- Sl st in next st.
- Sl st in next st.
- Sc in next st.
- Hdc in next st.
- Dc in next st.
- 2 dc in next st.
- 2 dc in next st.
- Dc in next st.
- Dc in next st.
- 2 dc in next st.
- 2 dc in next st.
- Dc in next st.
- Hdc in next st.
- Sc in next st.
- Sl st in final st.
Join to the first sl st if necessary.
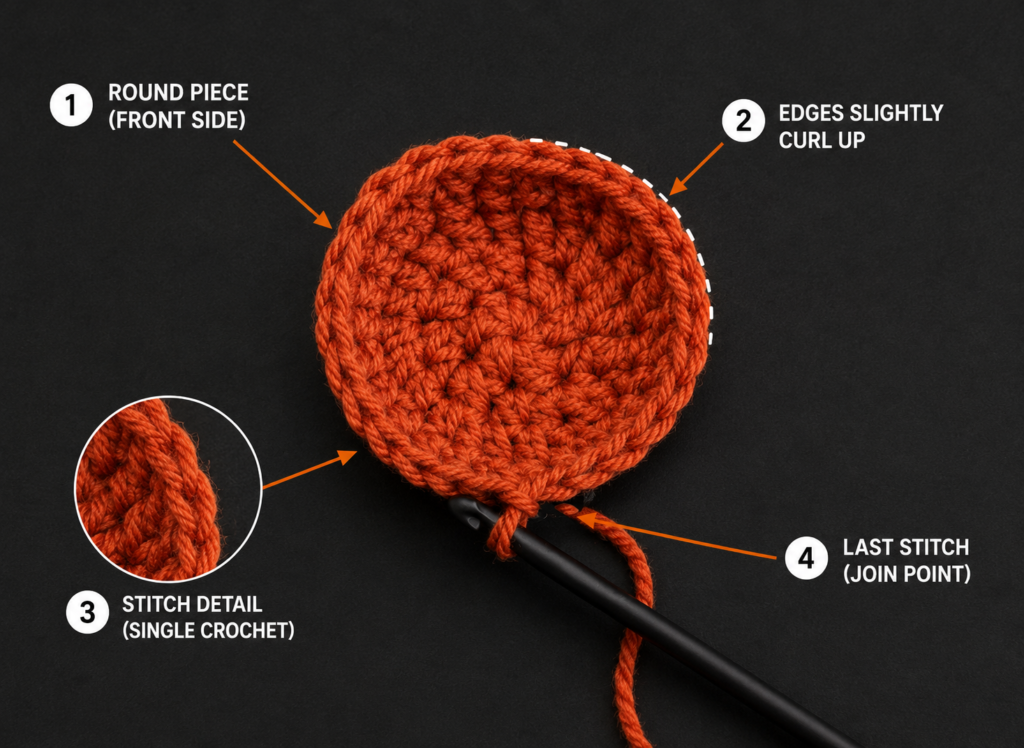
Final stitch count: 38 stitches, counting the shaping slip stitches.
Fasten off and weave in the ends.
The taller double-crochet groups create fullness around the sides. The shorter stitches pull the upper and lower areas inward.
Your panel should now resemble a softly rounded pumpkin.
Beginner tip:
Before beginning Round 4, place a stitch marker after stitch 15 of Round 3. This divides the shaping sequence into two halves and makes it easier to identify mistakes.
Common mistake to avoid:
Expecting every stitch to have the same height.
The changing heights are intentional. Do not replace the slip stitches or single crochets with taller stitches in an attempt to make the edge more uniform.
Step 5: Make a Second Matching Pumpkin Panel
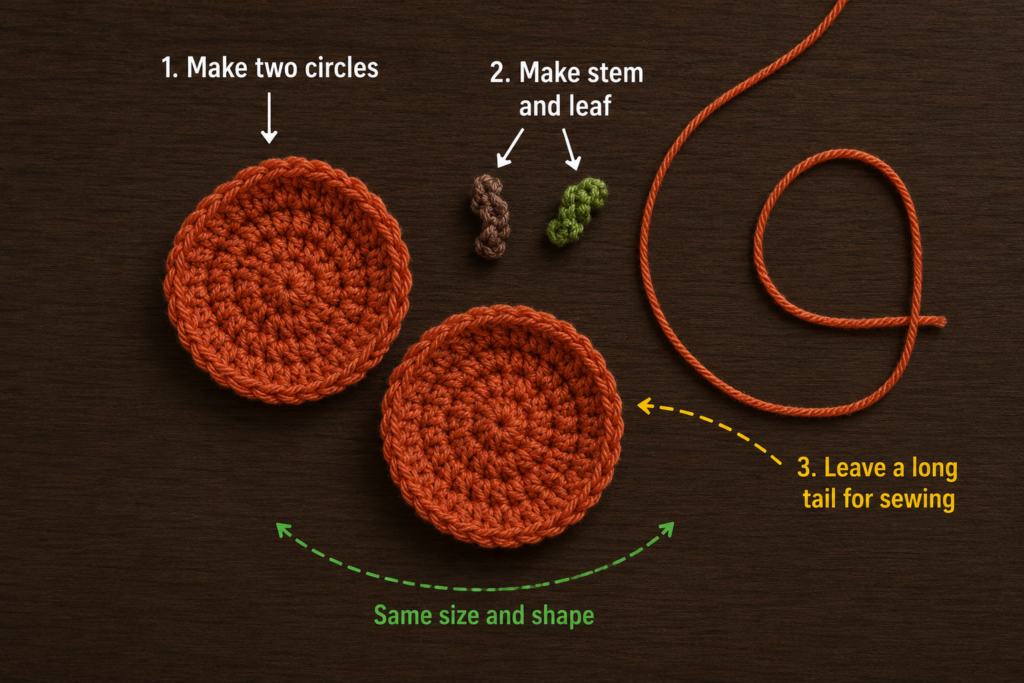
Repeat Steps 1–4 in the same color.
When the second panel is complete, place it directly over the first.
The edges do not need to be microscopically identical, but the general shape and dimensions should align closely.
Check:
- Round 1 contains 10 stitches.
- Round 2 contains 20.
- Round 3 contains 30.
- Round 4 follows the complete shaping sequence.
Do not join the panels yet.
Beginner tip:
Keep your first panel beside you as a physical reference while crocheting the second.
Common mistake to avoid:
Changing hook size accidentally.
Use the same 4.5 mm hook for both body panels.
Step 6: Crochet the Brown Stem
Switch to the 3.5 mm hook and deep bark-brown yarn.
Ch 5.
Starting in the second chain from the hook:
Row 1: Sc in each of the next 4 chains. Turn.
Stitch count: 4 sc
Do not chain.
Row 2: Sc in next 2 sts, sl st in next 2 sts.
Fasten off, leaving an approximately 8-inch tail for sewing.
The slight difference between the two rows creates a tapered handmade stem rather than a perfect rectangle.
Beginner tip:
Keep the foundation chain relaxed. You will need to insert the smaller hook into each chain comfortably.
Common mistake to avoid:
Cutting both yarn tails extremely short.
Leave one good sewing tail so you can attach the stem securely through both pumpkin panels.
Step 7: Crochet the Sage-Green Curly Vine
Using sage-green yarn and the 3.5 mm hook:
Ch 12.
Starting in the second chain from the hook:
Work 2 sc in each chain across.
You will make:
22 sc total.
The piece should begin curling naturally as you crochet.
Fasten off, leaving one long sewing tail.
You can twist the finished vine gently around your finger to emphasize the curl.
Do not stretch it straight.
Beginner tip:
The curl is created because you are forcing two stitches into each foundation chain. Allow the piece to coil naturally.
Common mistake to avoid:
Working only one sc in each chain.
That creates a straight strip rather than a spiral.
You now have:
- Two pumpkin panels.
- One stem.
- One curly vine.
Step 8: Join and Lightly Stuff the Pumpkin
Place the two pumpkin panels together with:
- Right sides facing outward.
- Wrong sides touching inside.
Align the top, bottom and side shapes as closely as possible.
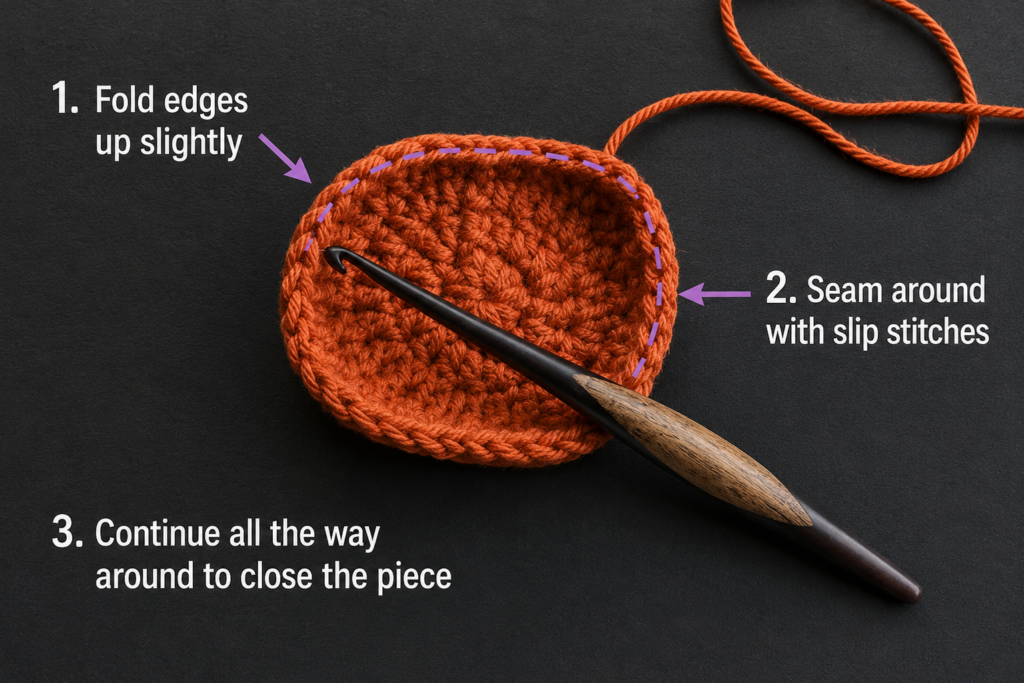
Using matching pumpkin yarn and the 4.0 mm hook, begin near the upper-left side.
Insert the hook through corresponding edge stitches on both panels.
Join the yarn.
Ch 1.
Single crochet through both layers.
Continue working one sc through corresponding edge stitches around the pumpkin.
Work down:
- The first side.
- Around the bottom.
- Up the second side.
Stop when approximately 2–3 inches of the upper edge remain open.
Pull the working loop long so it cannot unravel.
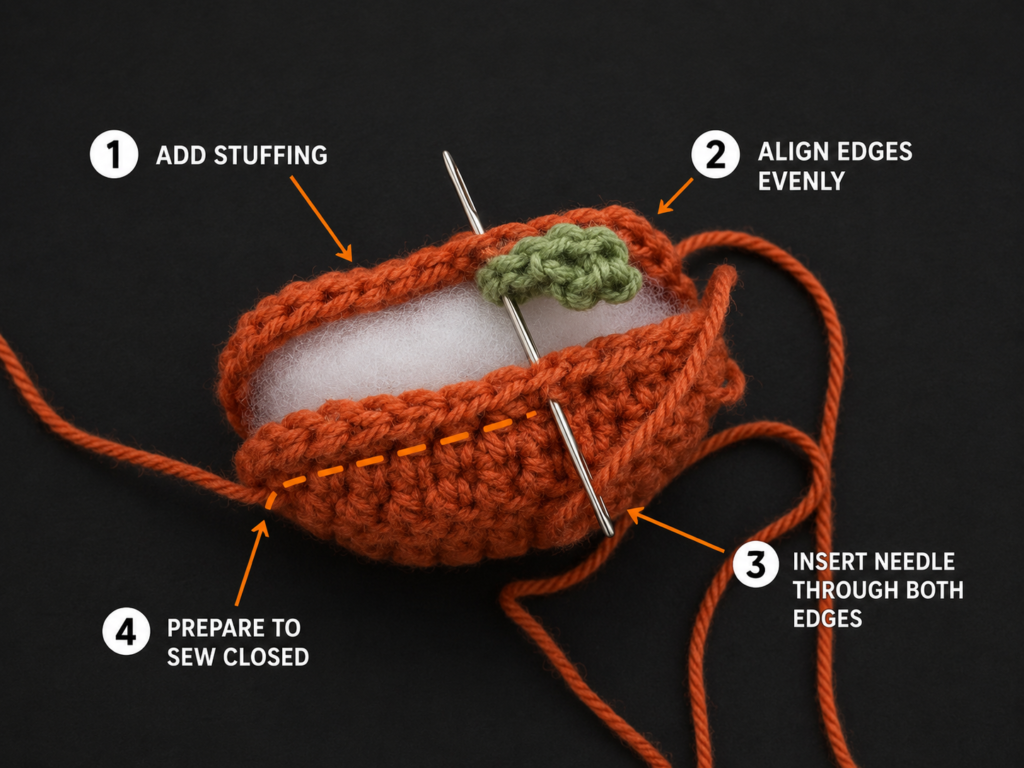
Insert a small amount of stuffing.
The goal is light dimension, not a firm ball.
Spread the stuffing into:
- Left side.
- Right side.
- Lower edge.
- Center.
The pumpkin should still look relatively flat when viewed from the side.
Beginner tip:
Add half the stuffing you initially think you need.
You can always add a tiny bit more before closing.
Common mistake to avoid:
Overstuffing.
Too much filling can distort the shaped edge, stretch the stitches and make the pumpkin look spherical rather than softly padded.
Step 9: Attach the Stem and Curly Vine
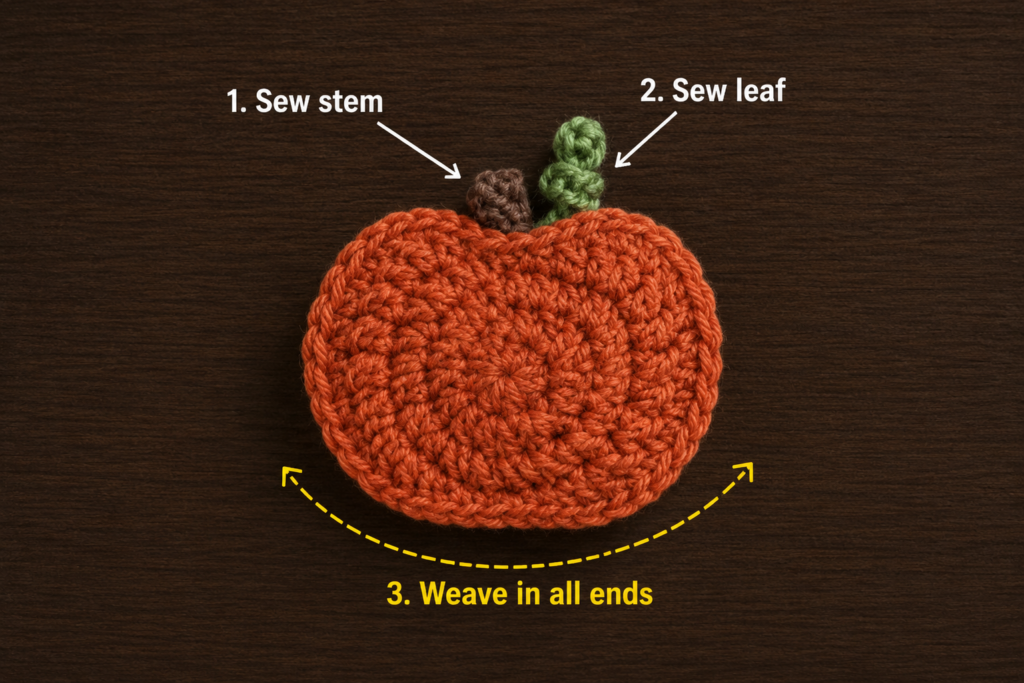
Position the brown stem at the top center.
Approximately one-quarter to one-third of the stem should sit between the two pumpkin panels.
Place the base of the sage vine beside the stem.
Thread the stem’s long tail onto your tapestry needle.
Pass the needle through:
- The back pumpkin panel.
- The stem base.
- The front pumpkin panel.
Reverse direction and pass through all three layers again.
Repeat until secure.
Now use the green sewing tail to secure the base of the vine in the same way.
Avoid sewing through the entire visible length of the curl. Only the base needs to be attached.
For additional shaping, thread a length of matching pumpkin yarn onto your tapestry needle.
Insert the needle at the top center and bring it out near the lower-center indentation.
Pull very gently.
Return the needle to the top and secure on the wrong side or discreetly within the upper seam.
This optional shaping stitch can create a little central definition.
Beginner tip:
Arrange the stem and vine first. Take a quick phone photo of their position before sewing. This makes it easier to keep all five pumpkins visually consistent.
Common mistake to avoid:
Attaching only through one surface stitch.
Pass the needle through substantial crochet fabric so the stem and vine remain secure.
Step 10: Close the Final Opening
Return the working loop to your 4.0 mm hook.
Continue single crocheting through both panels until the opening is fully closed.
If the seam becomes crowded around the stem and vine, work only where the corresponding edge stitches remain clearly accessible.
Join to the first joining sc with a sl st.
Fasten off.
Weave the final tail discreetly through the seam.
Gently massage the stuffing into an even layer.
Your first pumpkin is complete.
Beginner tip:
Look at the pumpkin from the front, back and side before trimming the final tail. Correct the stuffing distribution while you can still reopen a small section easily.
Common mistake to avoid:
Forcing extra stuffing into the last tiny opening.
Stop once the pumpkin has gentle dimension.
Step 11: Make Five Pumpkins
Repeat Steps 1–10 until you have five complete pumpkins.
For the sample palette, make:
- Pumpkin 1: Burnt orange.
- Pumpkin 2: Oatmeal cream.
- Pumpkin 3: Dusty mustard.
- Pumpkin 4: Mushroom taupe.
- Pumpkin 5: Burnt orange.
Use the same:
- Hook sizes.
- Stitch counts.
- Stem yarn.
- Vine yarn.
- Stuffing amount.
Small handmade differences are normal.
Before making the cord, arrange all five pumpkins on a flat surface and compare:
- Width.
- Height.
- Stem length.
- Vine size.
- Stuffing thickness.
Correct anything that looks dramatically different.
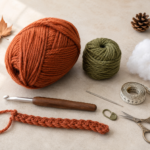
Step 12: Crochet the Garland Cord
Using warm cream yarn and your 4.0 mm hook:
First hanging loop
Ch 18.
Sl st into the first chain to form a loop.
Main garland section
Ch 180.
Lay the chain flat without stretching it.
Measure it against the location where you plan to hang the garland.
Add or remove chains as needed.
Second hanging loop
Ch 18.
Sl st into the first of these final 18 chains to form the second loop.
Fasten off and weave in the ends.
Your exact number of main chains is flexible.
A mantel, bookshelf, doorway, headboard or classroom display may require a shorter or longer garland.
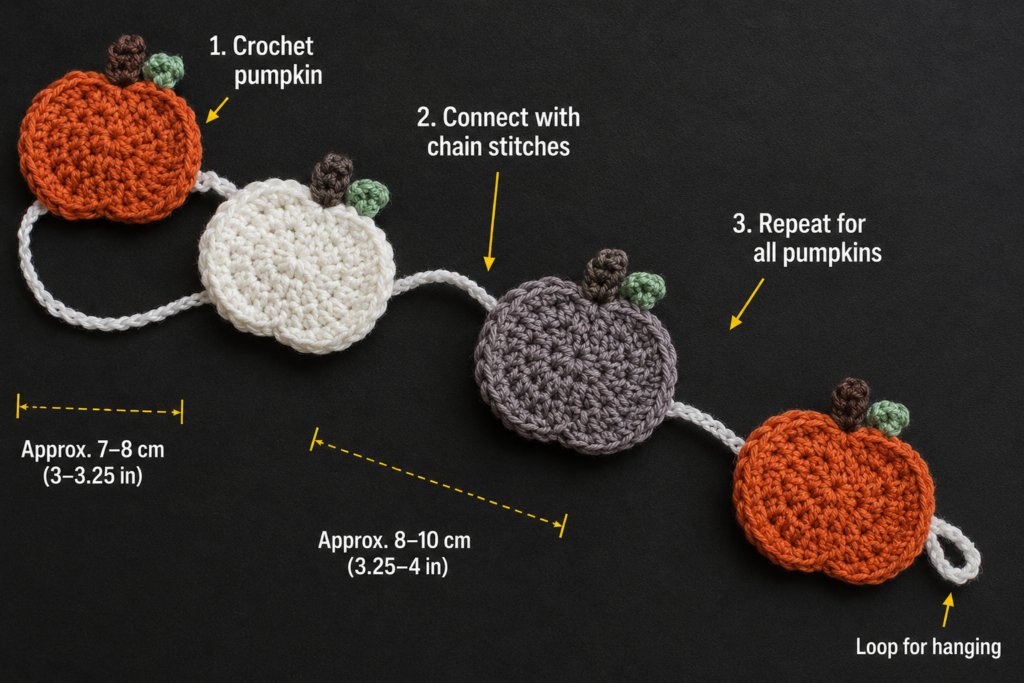
Step 13: Arrange and Attach the Pumpkins
Lay the cord horizontally on a large table.
Position the five pumpkins beneath it.
Begin with the middle pumpkin.
Attach that motif first at the precise center of the cord.
Then place:
- One pumpkin to its left.
- One pumpkin to its right.
- Final pumpkin at each outer side.
Leave approximately 5–8 inches between motifs, adjusting for the total length of your cord.
Thread a tapestry needle with a short piece of matching yarn.
For each pumpkin:
- Pass through a sturdy upper edge stitch.
- Pass through one or two chain links of the garland cord.
- Return through the pumpkin.
- Repeat once or twice.
- Secure and weave in the tail.
The pumpkin should hang upright without sliding freely along the cord.
Beginner tip:
Temporarily attach the pumpkins with removable stitch markers before sewing. Lift the complete garland and inspect the balance.
Common mistake to avoid:
Measuring only from pumpkin edge to pumpkin edge while the garland is stretched tightly.
Allow the cord to hang naturally before making the final spacing decision.
Pattern Notes or Stitch Notes
Turning-chain rules
The beginning ch 1 in Rounds 1–3 does not count as a stitch.
Do not accidentally crochet into the beginning chain when counting the round.
Stitch counts
For each pumpkin body panel:
- Round 1: 10 hdc.
- Round 2: 20 hdc.
- Round 3: 30 hdc.
- Round 4: 38 total stitches, including shaping slip stitches.
Repeat pattern
The main mathematical increase repeat occurs in Round 3:
*1 hdc in next st, 2 hdc in next st; rep from * around.
Joined-round notes
The body panel is worked in joined rounds rather than a continuous spiral.
At the end of each of Rounds 1–3:
- Locate the first actual hdc.
- Join to that stitch with a sl st.
Right side and wrong side
When joining the pumpkin:
- Right sides face outward.
- Wrong sides face each other inside.
The joining single crochet remains visible as a decorative edge.
Size-adjustment notes
The easiest way to change pumpkin size is to change yarn thickness and hook size while retaining the same stitch counts.
For smaller ornaments:
- Try sport or DK yarn.
- Use an appropriately smaller hook.
For larger mantel pumpkins:
- Try thicker yarn.
- Increase hook size appropriately.
Changing yarn can alter the finished gauge, drape and dimensions, even when two yarns fall under the same broad weight classification.
Common Beginner Mistakes
1. The magic ring will not close
Likely cause: The working yarn and starting tail crossed incorrectly or stitches were accidentally worked around only one strand when your chosen magic-ring method required two.
Fix: Remake the ring slowly and test the tail before completing ten stitches. Pulling the tail should visibly reduce the center opening.
2. The panel becomes bowl-shaped
Likely cause: Tight tension or a missed increase.
Fix: Recount immediately.
Your first three rounds must contain:
A slightly larger hook may help if the counts are correct but your fabric remains very tightly cupped.
3. The panel becomes very wavy
Likely cause: Accidental extra increases.
Fix: Do not add stitches simply because you see a visual gap. Follow the written stitch count.
4. The second panel is larger
Likely cause: Tension changed or a different hook was used.
Fix: Place the second panel over the first after every round.
Correct the mismatch before assembly.
5. The shaping round looks asymmetrical
Likely cause: A skipped base stitch or misplaced two-dc group.
Fix: Mark stitch 15 before starting Round 4. Treat the round as two halves.
6. The pumpkin looks like a ball
Likely cause: Too much stuffing.
Fix: Remove filling until the pumpkin becomes lightly padded rather than firm.
7. White stuffing shows through
Likely cause: Overstuffing stretched the crochet fabric.
Fix: Remove some filling and redistribute what remains.
For cream pumpkins, white stuffing is less noticeable. For darker colors, use only enough to add soft dimension.
8. The stem falls forward
Likely cause: Only the bottom tip was attached.
Fix: Secure a larger section of the stem base between the two body panels.
9. The vine does not curl
Likely cause: Only one sc was worked into each chain.
Fix: Work two single crochets into every chain.
10. The garland tilts to one side
Likely cause: Motifs are unevenly distributed.
Fix: Attach the center pumpkin first, then work outward symmetrically.
How to Customize This Crochet Project
Change the yarn colors
Traditional fall colors are only one option.
Try:
Rustic farmhouse palette
- Burnt orange.
- Cream.
- Taupe.
- Olive.
- Brown.
Soft modern palette
- Oatmeal.
- Dusty rose.
- Sage.
- Clay.
- Mushroom.
Halloween palette
- Orange.
- Black.
- Purple.
- Acid green.
- Cream.
Thanksgiving palette
- Terracotta.
- Mustard.
- Deep burgundy.
- Olive.
- Ivory.
Make fewer or more pumpkins
Try:
- 3 pumpkins for a small shelf.
- 5 pumpkins for a medium mantel.
- 7 pumpkins for a wide window.
- 9 pumpkins for a large classroom wall or party display.
Adjust the cord length before permanently attaching anything.
Leave the pumpkins flat
Skip the second panel and stuffing.
Make one flat panel per pumpkin and attach the motifs directly to the cord.
This version:
- Uses less yarn.
- Works faster.
- Stores flatter.
- Is suitable for lightweight bunting.
Make the pumpkins more dimensional
Add slightly more stuffing, but stop before the stitches become visibly stretched.
Alternatively, use thicker yarn.
Change the border
The visible joining edge can become a design feature.
Try:
- Same-color joining.
- Cream joining around orange pumpkins.
- Brown joining for rustic contrast.
- Sage joining to coordinate with vines.
Add embroidered ribs
Thread a tapestry needle with slightly darker yarn.
Add two or three loose vertical surface lines from top to bottom.
Keep them relaxed so they do not distort the pumpkin.
Add leaves
Crochet a tiny leaf for each pumpkin and sew it beside the vine.
For a cleaner minimalist design, use only the stem and curl.
Use individual pumpkins separately
One completed pumpkin can become:
- Fall tree ornament.
- Gift topper.
- Classroom decoration.
- Thanksgiving place-setting accent.
- Wreath embellishment.
- Door-hanger component.
- Basket filler.
- Handmade teacher gift.
Finishing Instructions
Fastening off
After the final stitch:
- Cut the yarn, leaving an adequate tail.
- Pull the cut end completely through the final loop.
- Tighten gently.
Do not trim immediately.
Weaving in ends
Use a tapestry needle.
Pass each tail:
- Under several substantial stitches.
- Reverse direction.
- Pass under several more stitches.
- Trim carefully.
For three-dimensional pumpkins, some tails can be hidden inside the body before the final seam is closed.
Blocking
Heavy blocking is normally unnecessary for lightly stuffed pumpkins.
However, blocking the body panels before assembly may be useful when they are slightly uneven.
Gently shape each panel without overstretching it.
Always use a method suitable for the specific yarn fiber.
Avoid excessive heat on synthetic yarn.
Shaping
After assembly, use your fingers to:
- Spread stuffing evenly.
- Reinforce the top indentation.
- Reinforce the lower indentation.
- Straighten the stem.
- Reshape the curly vine.
Washing and care
Follow the care instructions supplied with your chosen yarn.
For a multi-part handmade decoration, gentle cleaning and flat drying generally help protect:
- Seams.
- Stuffing.
- Stem placement.
- Vine shape.
Store the garland loosely rolled or laid flat rather than crushing the pumpkins under heavy decorations.
Safety Note
This pattern creates seasonal decoration, not a toy.
A long garland cord can present an entanglement hazard if placed within reach of babies or very young children. Hang it securely and keep long cords away from cribs, beds, play areas and other locations where entanglement could occur.
Pets may also chew yarn, stuffing or hanging loops, so choose placement accordingly.
Quick Printable-Style Summary
Project: Easy Crochet Pumpkin Garland
Skill level: Beginner to Easy
Finished pumpkin size: Approximately 4–4.5 inches wide.
Finished garland: Approximately 52–60 inches, adjustable.
Yarn: Medium-weight cotton, acrylic, or blend.
Hooks:
- 4.5 mm for panels.
- 3.5 mm for stems and vines.
- 4.0 mm for joining and cord.
Main stitches:
- Ch.
- Sl st.
- Sc.
- Hdc.
- Dc.
Pumpkin panel
Make 2 per pumpkin.
Round 1: 10 hdc into magic ring. Join.
Round 2: 2 hdc in each stitch. 20 sts.
Round 3: *1 hdc, 2 hdc in next; rep around. 30 sts.
Round 4: Use alternating sl st, sc, hdc, dc and dc increases to create the shaped 38-stitch outer edge.
Stem
Ch 5.
Row 1: 4 sc.
Row 2: 2 sc, 2 sl st.
Vine
Ch 12.
Work 2 sc in each chain from the second chain onward.
22 sc.
Assembly
Place two panels together with wrong sides facing inward.
Single crochet around most of the perimeter.
Stuff lightly.
Sew in stem and vine.
Close remaining opening.
Repeat
Make five pumpkins.
Garland cord
Ch 18 and join into first hanging loop.
Ch approximately 180 for main section.
Ch 18 and form second loop.
Finishing
Space five pumpkins evenly.
Sew securely to cord.
Weave in all ends and reshape.
FAQ
Is a crochet pumpkin garland suitable for beginners?
Yes, provided the beginner is comfortable with basic crochet stitches and willing to follow a shaping sequence carefully. This project uses a magic ring, chains, slip stitches, single crochet, half double crochet, double crochet, increases and simple sewing. Under the Craft Yarn Council’s general classifications, basic stitches with simple shaping fall within the basic-to-easy range.
Can I make the crochet pumpkin garland without a magic ring?
Yes.
A simple alternative is:
- Ch 3 or 4.
- Join with a sl st to form a small ring.
- Work the first ten hdc into that ring.
The center hole may remain slightly more visible.
Can I make flat pumpkins instead of stuffed pumpkins?
Yes.
Make one panel per motif and skip the second panel, stuffing and joining seam.
Attach the flat motifs directly to the garland cord.
What yarn is best for a crochet pumpkin garland?
Smooth medium-weight cotton, acrylic, or a blend all work well.
Cotton generally provides crisp stitch definition, while acrylic can offer a broad color selection and a lighter feel.
Yarn category alone does not guarantee identical dimensions or behavior, so maintain the same yarn, hook and tension when consistent sizing matters.
How many pumpkins should I put on a garland?
There is no fixed requirement.
Practical options include:
- 3 for a small shelf.
- 5 for a medium mantel.
- 7 for a wide window.
- 9 or more for a large display.
Measure your intended location first.
How do I stop my pumpkins from looking different sizes?
Use:
- The same yarn weight.
- The same hook.
- The same stitch counts.
- Similar stuffing amounts.
Keep the first finished pumpkin nearby and compare every new motif against it.
Why does my crochet pumpkin look too round?
The most common reasons are:
- Too much stuffing.
- Incorrect shaping-round stitches.
- Using tall stitches where short stitches were required.
- Missing the upper or lower indentation.
Remove some stuffing and confirm the Round 4 sequence.
Conclusion
A crochet pumpkin garland is one of those seasonal projects that becomes easier and more satisfying with every repeated motif.
The first pumpkin teaches you the construction.
The second helps you understand the shaping round.
By the third, the process starts feeling familiar.
And once all five are lined up on the cream cord, the individual pieces become one complete reusable fall decoration.
The key checkpoints are simple:
Keep the first three round counts at 10, 20 and 30 stitches. Follow the shaping sequence carefully. Make two matching panels. Stuff lightly rather than firmly. Secure the stem and vine through substantial stitches. Finally, arrange every pumpkin before permanently sewing it to the cord.
The result is a cozy handmade decoration that can work across a mantel, bookshelf, classroom wall, window, Thanksgiving display or autumn party backdrop—and return every fall.